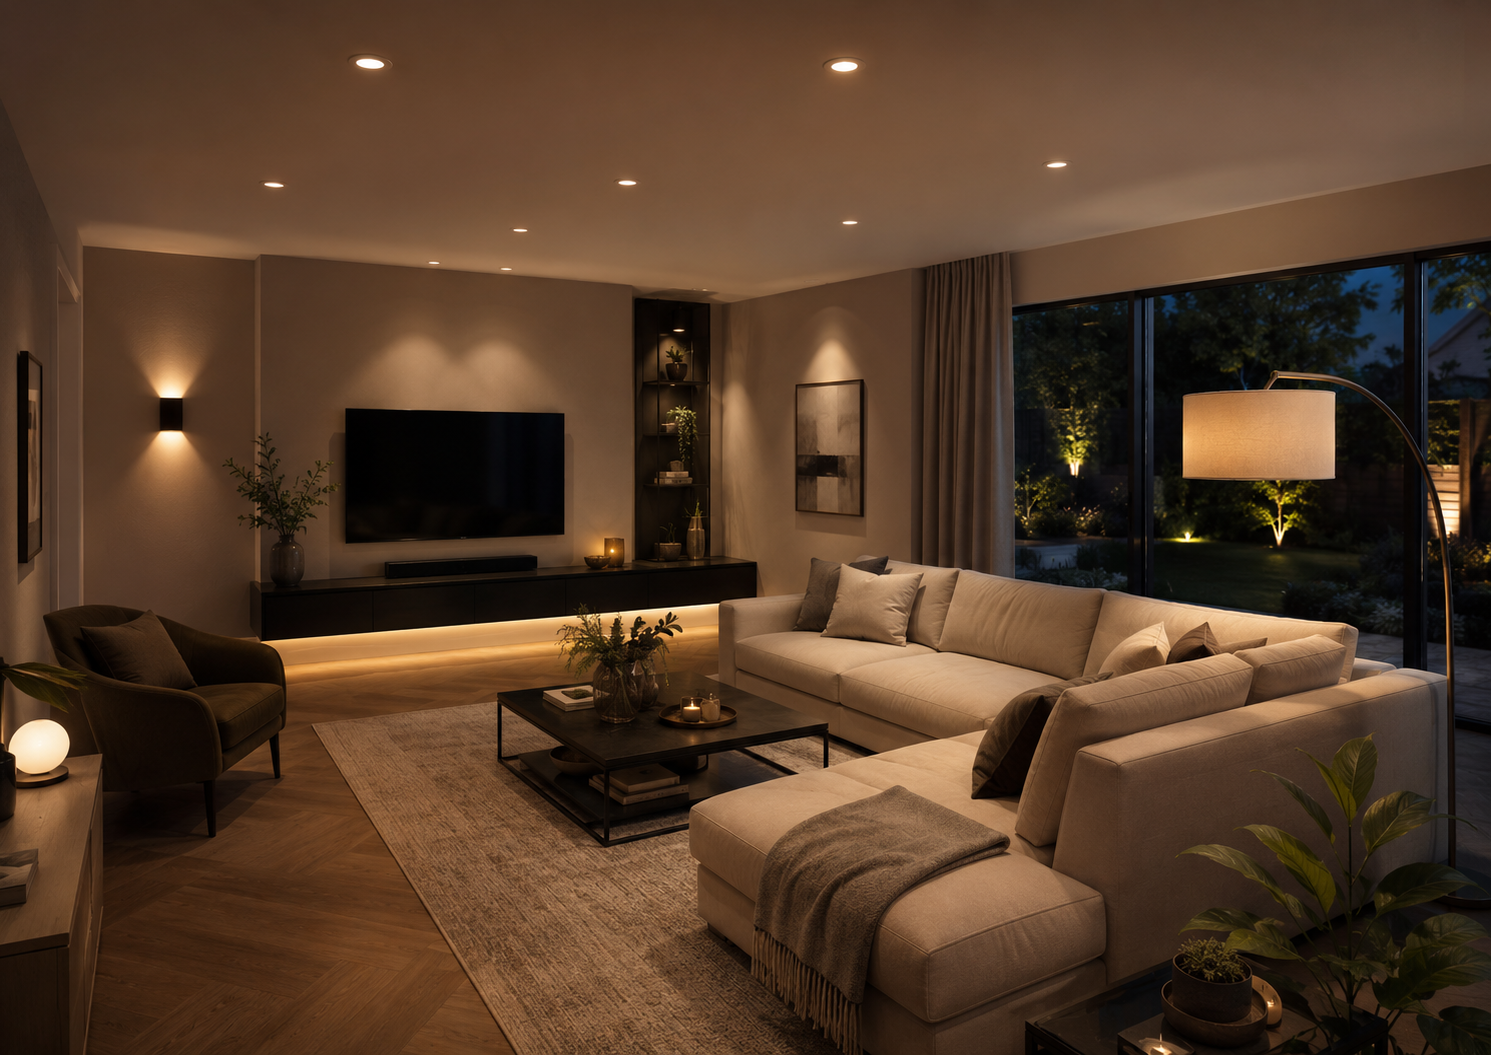
Living Room Downlights: Layout, Spacing and Planning Tips
Living room downlights need a different approach from kitchens, bathrooms or hallways.
A living room is usually a place to relax, watch TV, read, entertain and move between different seating
zones. Good lighting should feel comfortable and flexible, not like a flat showroom grid.
A well-planned living room downlight layout balances general light with softer layers such as floor
lamps, table lamps, wall lights, picture lights or LED strip lighting. The goal is not simply to fill
the ceiling with fittings. It is to create enough light for everyday use while keeping glare, shadows
and visual fatigue under control.
You can test different living room downlight spacing, beam angles, lumen outputs and room dimensions in
Downlight Planner, the downlight calculator for comparing layout options before
committing to a final plan.
What good living room downlight planning means
Good living room downlight planning is about comfort first. Unlike a kitchen, where strong task lighting
over benches is often the priority, a living room needs light that can shift with the activity.
A useful living room downlight layout should help with:
Planning goal
What it means in a living room
Comfortable general light
Enough brightness for everyday use without making the room feel harsh.
Low glare
Avoiding bright fittings directly above eyes, sofas and TV viewing positions.
Flexible mood
Using dimming and lighting layers so the room can feel bright, soft or cosy.
Furniture awareness
Planning around sofas, coffee tables, media units, walkways and feature walls.
Shadow control
Avoiding dark corners while keeping some contrast and atmosphere.
Visual balance
Combining ceiling light with lamps, wall lights or feature lighting.
The best living room downlights usually support the room rather than dominate it. They should help the
space work at night, but they do not need to be the only source of light.
Start with the room layout, not the ceiling
A common mistake is to draw a neat grid of downlights before thinking about how the living room is
actually used. In a living room, furniture placement matters more than symmetry on the ceiling.
Before planning the downlight layout, mark:
Sofa positions.
TV or projector screen location.
Main walkways.
Coffee table or ottoman.
Reading chairs.
Feature walls, artwork or shelving.
Windows and sliding doors.
Floor lamp and table lamp locations.
Any open-plan connection to kitchen, dining or hallway areas.
This helps you avoid placing downlights directly where they may cause discomfort, such as above a
seated person's face or in a line that reflects off the TV.
For open-plan living areas, treat the living zone as its own area rather than simply continuing the
kitchen grid across the whole ceiling. The living room often benefits from softer spacing, warmer
dimming scenes and more layered light.
Living room downlight spacing
There is no single perfect living room downlight spacing because the result depends on ceiling height,
beam angle, lumen output, wall colours, furniture and how bright you want the room to feel.
As a broad planning starting point, many living rooms use downlights spaced roughly 1.5 m to 2.4 m
apart, depending on the fitting and desired effect. Lower ceilings, wider beam angles and lighter
finishes may allow wider spacing. Higher ceilings, darker finishes or narrower beam angles may need
closer spacing or more support from other lighting.
A simple way to think about spacing:
Situation
Planning approach
Small living room
Fewer fittings, carefully positioned to avoid glare and over-lighting.
Large living room
Separate the room into zones rather than using one uniform grid.
Dark walls or dark floors
Consider more light or stronger layered lighting.
Low ceiling
Be extra careful with glare and avoid making the ceiling feel crowded.
High ceiling
Check whether the chosen beam angle and lumen output suit the height.
TV-focused room
Avoid bright downlights directly in the main viewing line.
Use Downlight Planner to test the living room dimensions, ceiling height, beam angle and lumens. The
planner can help you compare whether a layout feels sparse, balanced or excessive before the room is
built or renovated. For broader spacing context, see the
Downlight Spacing Guide and
Lumens, Lux and Beam Angle Explained.
Wall offsets: how far from the walls?
Wall offsets affect how the room feels.
Downlights placed too close to the walls can create strong scalloping or uneven bright patches.
Downlights placed too far from the walls can leave the room perimeter gloomy.
As a planning guide, many living rooms start with a wall offset of around 600 mm to 900 mm from the wall
to the centre of the downlight. This varies with beam angle, ceiling height and whether you want to wash
the wall, light artwork or simply provide general room light.
For living rooms, wall offsets are especially important around:
TV walls.
Artwork walls.
Built-in shelving.
Curtains or feature panelling.
Fireplace surrounds.
Long blank walls that may look dull at night.
A downlight close to a feature wall can be useful, but it should be intentional. For example, a row of
downlights near a wall may help highlight artwork or textured surfaces. In a TV area, however, too much
light on or near the screen can be distracting.
Glare: the biggest living room downlight issue
Glare is one of the most common problems with living room downlights. A layout can look fine on a plan
but feel uncomfortable once people are seated.
Living rooms have more low, relaxed seating than many other rooms. That means people often look across
the room at a lower angle, making bright ceiling fittings more noticeable.
To reduce glare in the planning stage:
Avoid placing bright downlights directly above main sofa seats where people recline or look upward.
Be cautious with fittings between the sofa and TV, especially if they fall in the viewer's line of sight.
Consider fewer, better-positioned downlights rather than many evenly spaced fittings.
Use dimming so the room can be softened in the evening.
Balance ceiling lighting with lamps or wall lights at eye level.
Choose layouts that light surfaces and zones, not just the floor.
A living room does not need to be uniformly bright. A little contrast often makes the room feel calmer
and more inviting.
TV positions and media walls
TV placement should strongly influence your living room downlight layout. Poorly positioned downlights
can reflect on the screen, create bright patches near the TV or make movie watching uncomfortable.
When planning around a TV:
Area
Planning tip
Directly in front of the TV
Avoid bright fittings that may reflect on the screen.
Above the sofa
Use care, especially where people lean back or watch for long periods.
Behind or beside the TV
Soft wall lighting or low-level layers may be more comfortable.
Media cabinetry
Consider whether shelves or cabinets need separate feature lighting.
Open-plan rooms
Give the TV zone its own dimming scene if possible.
Downlights can still work well in a living room with a TV, but they should not be treated as the only
lighting layer. Lamps, wall lights or gentle indirect lighting often create a better evening setting
than ceiling light alone.
Sofas, chairs and task areas
Furniture should guide the living room downlight layout. A downlight directly over the centre of a
coffee table may look tidy on a drawing, but it may not be useful if it creates glare for people seated
around it.
For sofas and lounge chairs, think about how people will sit, read, talk and watch TV. A downlight near
the front edge of a sofa can sometimes provide useful light without shining straight down into someone's
face. A lamp beside the sofa may be better for reading than relying on ceiling light.
Useful task-focused areas may include:
A reading chair.
A games table.
A study nook within the living room.
Display shelves.
Artwork or family photos.
A piano or hobby corner.
For these areas, downlights can help, but they are not always the best single solution. A floor lamp,
table lamp, wall-mounted reading light or feature light may provide more control and comfort.
Dimming and lighting scenes
Dimming is especially valuable in a living room. The room may need to be bright for cleaning or
entertaining, softer for watching TV and very low for relaxing at night.
Rather than planning one switch group for every downlight, it can be useful to think in scenes:
Scene
Lighting feel
Everyday
Moderate general light for moving around and casual use.
Entertaining
Brighter but still comfortable, with lamps or wall lights adding warmth.
TV night
Very low ceiling light, with soft side or background lighting.
Reading
Task light near chairs or sofas, supported by low ambient light.
Feature
Artwork, shelving or wall lighting used for atmosphere.
The exact switching and control approach should be resolved with the relevant project professionals,
but from a planning point of view, it helps to avoid treating all living room downlights as one flat
layer. See
Dimmable Downlights for Comfortable Rooms
for more comfort planning.
When downlights alone are not ideal
Downlights are useful, but a living room lit only by ceiling fittings can feel flat. The space may be
bright enough on paper but still lack warmth, depth and comfort.
Downlights alone may not be ideal when:
The room is mainly used for TV and relaxation.
There are low ceilings and glare is a concern.
The room has dark finishes that absorb light.
You want a cosy evening atmosphere.
There are feature walls, artwork or shelving worth highlighting.
The seating layout changes often.
The room is part of an open-plan area with different lighting needs.
Layered lighting usually works better. This may include downlights for general light, lamps for warmth,
wall lights for softness and feature lighting for texture. The aim is to create a room that can change
mood, not a single brightness level that has to suit everything.
Example living room downlight planning approach
For a typical rectangular living room, start by identifying the main seating and TV wall. Then plan
downlights around the usable zones rather than forcing a perfect grid.
A practical early approach might be:
Mark the sofa, TV, coffee table and walkways.
Keep downlights away from direct TV reflections where possible.
Use perimeter or zone-based downlights rather than placing every fitting in the middle of the room.
Add lamps or wall lights where people read or relax.
Use dimming to create softer evening settings.
Test the room size, lumens and beam angle in Downlight Planner.
Review the plan with the project team before final selections are made.
This process helps create a more comfortable living room downlight layout than starting with a generic
ceiling grid.
Common living room downlight mistakes
Using too many downlights
More fittings do not automatically mean better lighting. Too many downlights can make a living room feel
harsh, busy or commercial.
Ignoring the TV position
Downlights that reflect on the TV or sit in the main viewing line can become annoying, especially at
night.
Placing downlights directly over heads
A fitting above a sofa or recliner may create glare when people lean back or look across the room.
Relying on downlights only
A living room usually feels better with lamps, wall lights or feature lighting. Ceiling light alone
often lacks atmosphere.
Creating a perfect grid that ignores furniture
A symmetrical ceiling plan may not suit the way the room is used.
Not planning dimming
Without dimming, the room may be too bright for relaxing and too flat for evening use.
Forgetting wall and surface finishes
Dark floors, dark walls and heavy curtains can make a room feel dimmer. Light finishes usually reflect
more light.
Practical living room downlight checklist
Use this checklist when planning living room downlights:
Confirm the room dimensions in metres.
Mark the sofa, TV, chairs, tables, shelving and main walkways.
Decide whether the room needs bright general light, soft mood light or both.
Avoid placing bright downlights directly above main seated positions.
Check whether downlights could reflect on the TV.
Start with sensible spacing, then adjust for ceiling height, beam angle and lumens.
Consider wall offsets around 600 mm to 900 mm as an early planning guide.
Use lamps, wall lights or feature lighting to avoid a flat showroom feel.
Plan for dimming or separate lighting scenes where appropriate.
Test layout options in Downlight Planner.
Review the final plan with your electrician, builder, designer or lighting supplier.
Planning guidance only disclaimer
This page is for general planning guidance only. It does not replace product data, professional judgement or a
site-specific lighting assessment. Real-world results vary by fitting photometry, ceiling height, room finishes,
furniture, beam angle, dimming and installation conditions.
FAQ
How many downlights do I need in a living room?
It depends on the room size, ceiling height, lumen output, beam angle, finishes and how the room is
used. A small living room may only need a few well-placed downlights plus lamps, while a large
open-plan space may need separate lighting zones. Use a downlight calculator such as Downlight
Planner to compare options.
What is the best living room downlight spacing?
As an early planning guide, many living rooms start around 1.5 m to 2.4 m between downlights. This
is not a fixed rule. The right living room downlight spacing depends on the fitting, beam angle,
ceiling height, room colours and furniture layout.
Should downlights go above the sofa?
Be careful with downlights directly above sofas, recliners or lounge chairs. They can create glare
when people lean back or watch TV. It is often better to position downlights around seating zones
and use lamps or wall lights for softer task lighting.
Are downlights good for watching TV?
Downlights can be part of a good TV room lighting plan, but they should be positioned carefully.
Avoid bright fittings that reflect on the screen or sit directly in the viewer's line of sight.
Dimming and soft side lighting usually make TV viewing more comfortable.
Do I still need lamps if I have living room downlights?
Usually, yes. Lamps add warmth, flexibility and atmosphere. They are especially useful for reading,
relaxing and creating a softer evening feel. Downlights provide general light, while lamps and wall
lights help the room feel more comfortable.
Can Downlight Planner help with a living room layout?
Yes. Downlight Planner lets you test room dimensions, downlight spacing, lumens, beam angle and
layout options. It is useful for comparing ideas before final selections are discussed with your
project team.
Use the Downlight Planner
Test room dimensions, fitting lumens, beam angle and layout assumptions in the planner before refining the
setout.