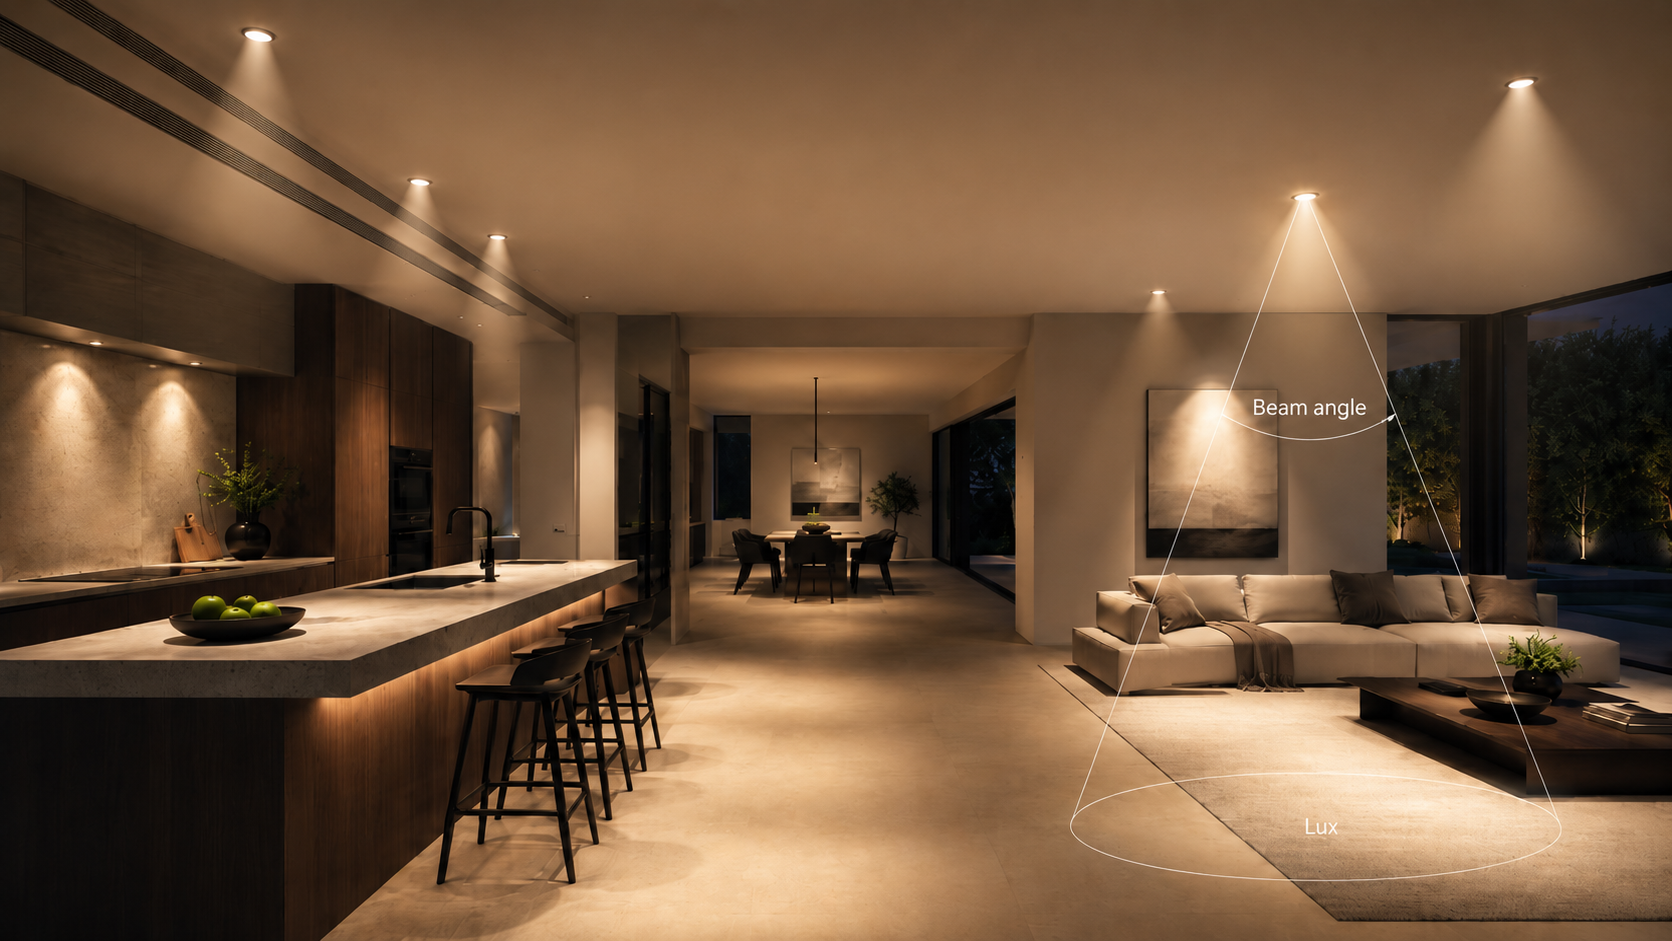
Choosing downlights can feel confusing because the numbers on the box do not always explain how the room will
actually feel.
One downlight might advertise 900 lumens and make a kitchen bench feel bright and focused. Another 900 lumen
downlight might feel softer, wider and less intense, even though the light output looks the same on paper.
The difference usually comes down to lumens, lux, beam angle, ceiling height, spacing, room finishes and
utilisation. These are the planning numbers that help you estimate how much light reaches the areas you care
about.
This guide explains the key terms in plain English for homeowners, electricians, builders and designers. It also
shows how Downlight Planner helps you adjust light output in lumens, downlight beam angle,
target lux, custom target lux and utilisation when planning a room.
Quick summary
Term
Plain-English meaning
Why it matters when planning downlights
Lumens
How much light a downlight produces
Higher lumens usually means more total light, but not always a brighter-feeling room
Lux
How much light lands on a surface
Helps estimate brightness on floors, benches, desks and general room areas
Beam angle
How wide or narrow the light spreads
Changes coverage, intensity, spacing and the feel of the room
Ceiling height
Distance from the downlight to the target surface
Higher ceilings spread light further but reduce intensity on the surface
Beam spread
The approximate width of the light pool
Helps compare narrow beams and wide beams
Utilisation
The share of light that usefully reaches the room or target area
Accounts for losses from room shape, finishes and layout
Maintained light level
The expected light level after allowing for real-world reduction over time
Helps avoid planning only for brand-new, perfect conditions
Target lux
The brightness level you are aiming for
Different rooms need different planning targets
Lumens: how much light the downlight produces
Lumens measure the total visible light output from a fitting. When people search for downlight lumens, they are
usually asking, "How bright should each downlight be?"
A higher lumen number generally means the fitting produces more light. For example, an 800 lumen downlight
produces more total light than a 500 lumen downlight. But lumens alone do not tell you how that light is
distributed around the room.
Lumen output per downlight
Common planning impression
400-600 lm
Softer general lighting, smaller rooms, bedrooms or accent areas
600-900 lm
Common range for general residential downlight planning
900-1,200+ lm
Brighter output, larger rooms, higher ceilings or task-focused areas
These are not rules. A 700 lumen fitting with a narrow beam can feel punchier than a 1,000 lumen fitting with a
very wide beam. That is why lumens should be considered together with lux and beam angle.
You can test different lumen values in Downlight Planner to see how changing the output affects the estimate.
Lux: how much light reaches the surface
Lux measures how much light lands on a surface. This is the key difference:
Lumens = light produced by the downlight. Lux = light received on the surface.
When planning lux for downlights, the surface might be the floor, a kitchen bench, a dining table, a desk or
the general working plane of the room.
For example, two rooms might both use six 800 lumen downlights. The room with a lower ceiling, lighter walls and
better beam coverage may feel brighter than the room with a high ceiling, dark finishes and wider spacing. The
total lumens are the same, but the lux where people need light can be different.
Room or area
Common planning target lux range
Planning note
Bedroom
100-150 lux
Softer general light is often preferred
Living room
150-250 lux
Flexible lighting helps create comfort
Kitchen general area
250-350 lux
Usually brighter than bedrooms and lounges
Kitchen bench or task area
300-500 lux
Task surfaces often need more usable light
Hallway
80-150 lux
Usually lower than active work areas
Home office or study
300-500 lux
Task lighting and layout matter
These values are practical planning ranges, not compliance targets. The right target depends on room use,
finishes, personal preference, dimming and the type of fitting used.
In Downlight Planner, you can select a lighting mode or target lux, enter a custom target lux, and compare how
many fittings may be needed for a room.
Beam angle: how wide the light spreads
The downlight beam angle describes how wide the main cone of light is. A narrow beam concentrates light into a
smaller area. A wide beam spreads light over a larger area.
Broad room coverage, lower ceilings, even general light
A narrow beam can create a brighter pool of light directly below the fitting, but it may leave more noticeable
gaps if fittings are spaced too far apart. A wide beam can cover more area, but the same lumens are spread
thinner, so the centre may feel less intense.
This is why beam angle changes both spacing and coverage. Wider beams can often overlap more easily across a
room. Narrow beams usually need more careful spacing if the goal is even general lighting.
Beam spread examples
Beam spread is the approximate width of the light pool at a surface. It depends on the beam angle and the
distance from the downlight to the surface.
The simplified idea is: higher ceiling = wider beam spread but lower intensity. Wider beam angle = wider
coverage but less concentrated light.
Ceiling height
40° beam
60° beam
90° beam
2.4 m
1.7 m
2.8 m
4.8 m
2.7 m
2.0 m
3.1 m
5.4 m
3.0 m
2.2 m
3.5 m
6.0 m
These figures are simple planning estimates. Actual fittings do not produce a perfect cone, and useful light
normally fades towards the edge of the beam. Manufacturer photometry, lens design and trim shape can all change
the result.
Why two fittings with the same lumens can feel different
Two downlights can both be labelled 800 lumens and still feel very different in the same room.
Reason
What changes in the room
Beam angle
A narrow beam feels more concentrated; a wide beam feels softer and broader
Optical design
The lens, reflector and diffuser affect glare, softness and distribution
Ceiling height
The same fitting feels less intense when mounted higher
Room finishes
Light walls and ceilings reflect more light; dark finishes absorb more
Spacing
Good overlap feels smoother; poor spacing can create bright spots and dim patches
Furniture and layout
Tall cabinets, islands, shelves and furniture can block or absorb light
Dimming
A dimmed fitting may suit comfort but lower the achieved lux
Maintenance over time
Dust, ageing and surface changes can reduce the maintained light level
For example, an 800 lumen downlight with a 36° beam over a kitchen island may feel bright and punchy. The
same 800 lumens with a 90° beam may feel gentler because the light is spread over a wider area. Neither is
automatically better. The right choice depends on the room and the result you want.
Narrow beam vs wide beam
A narrow beam is useful when you want to direct light to a smaller area. It may suit a high ceiling, a feature
wall, an artwork, a kitchen island or a specific task zone. The trade-off is that the room can become patchy if
there is not enough overlap between fittings.
A wide beam is useful for broad, even general light. It can make a bedroom, hallway or living room feel softer
and less spotlight-like. The trade-off is that the same lumen output is spread across more area, so it may not
feel as bright on a bench or desk.
Scenario
Narrow beam
Wide beam
Standard bedroom
May feel spotty if overused
Often softer and more comfortable
Kitchen bench
Can create useful task focus
May need higher lumens or closer planning for task brightness
High ceiling
Can help keep light controlled
May spread too broadly and lose intensity
Open living area
Useful for zones or features
Good for broad general coverage
For most homes, downlight planning often involves a mix of goals: enough general light, suitable task light,
comfortable spacing and a room feel that suits how the space is used.
Standard ceiling vs high ceiling
Ceiling height has a major effect on downlight planning.
In a room with a standard 2.4 m ceiling, light has a shorter distance to travel. The beam reaches the floor or
work surface sooner, so the centre of the beam can feel stronger. Wide beams can also overlap easily, which
helps create smooth general lighting.
In a room with a 3.0 m ceiling or higher, the same downlight may feel weaker at the surface. The beam has spread
further by the time it reaches the floor, and the light is less concentrated. This does not always mean you need
more downlights. It may mean you need to compare higher lumens, a different beam angle, a revised layout or a
different target lux.
Planning factor
Standard ceiling
Higher ceiling
Beam spread
Smaller pool of light
Larger pool of light
Surface brightness
Usually stronger
Usually lower for the same fitting
Spacing sensitivity
Moderate
More important to check coverage
Common adjustment
Balance comfort and coverage
Review lumens, beam angle and layout
This is one reason a downlight calculator is useful. Instead of guessing from lumens alone, you can compare
ceiling height, room size, target lux and fitting assumptions together.
Kitchen vs bedroom example
A kitchen and bedroom may use similar-looking downlights, but the lighting goals are different.
A kitchen usually needs more usable light, especially around benches, preparation areas and circulation spaces.
A layout that feels comfortable in a bedroom may feel underdone in a kitchen because the task is different.
A bedroom usually benefits from softer general light. Too many high-output downlights, or beams that are too
narrow, can make the room feel harsh. Lower target lux, warmer styling choices, dimming and careful placement
are often part of the planning conversation.
Room
Planning priority
Practical downlight approach
Kitchen
Brighter task-friendly light
Consider higher target lux and good overlap over working areas
Bedroom
Comfortable general light
Consider lower target lux and softer, wider coverage
Living room
Flexible mood and general use
Balance even coverage with zones and dimming
Hallway
Safe movement and orientation
Lower target lux may be enough for general circulation
In Downlight Planner, this is handled through lighting mode or target lux. You can start with a room type, then
adjust the target if the space needs to feel brighter or softer.
Utilisation: how much light is actually useful
Utilisation describes how much of the light produced by the fittings usefully contributes to the target area.
Not every lumen from a downlight becomes useful lux on the surface.
Some light is absorbed by dark floors, dark walls, furniture, cabinetry or room geometry. Some light lands where
it is not needed. Some is lost because of the way the fitting distributes light.
Installed light output
Utilisation assumption
Useful light estimate
8,000 lumens
80%
6,400 lumens
8,000 lumens
60%
4,800 lumens
8,000 lumens
40%
3,200 lumens
This is why two rooms with the same number of downlights can feel different. A bright, open room with pale
finishes may use light efficiently. A room with dark surfaces, deep cabinetry or complex geometry may need a
different plan to achieve a similar maintained light level.
Downlight Planner includes utilisation as an input so users can make a practical allowance instead of assuming
all produced light is perfectly useful.
Maintained light level: planning beyond day one
The maintained light level is the expected level of light after allowing for real-world changes over time. A
room may not stay as bright as it looked on day one. Light output can reduce, lenses and surfaces can collect
dust, and room finishes or furniture can change how light reflects.
For planning purposes, maintained light level helps avoid designing only for ideal conditions. It is not about
guaranteeing an exact result. It is about remembering that real homes and projects are not laboratory
environments.
Planning view
What it assumes
Risk
Initial light level only
Brand-new fittings and clean surfaces
May feel lower over time
Maintained light level
Allows for real-world reduction
More realistic for planning
Adjustable target lux
Lets you test brighter or softer outcomes
Helps compare options early
This is especially useful for kitchens, home offices and other areas where task visibility matters.
How Downlight Planner helps
Downlight Planner is designed to make these variables easier to compare. Instead of relying on a single rule of
thumb, you can adjust the assumptions that shape the result.
Planner input
What you can test
Light output in lumens
Compare lower-output and higher-output fittings
Beam angle
See how narrower or wider beams affect coverage
Lighting mode or target lux
Match the room to a practical brightness goal
Custom target lux
Set your own preferred planning target
Utilisation
Allow for how efficiently the room uses light
Room dimensions
Estimate the number and spacing of downlights
Ceiling height
Compare standard and higher ceiling scenarios
This makes the planner useful for early discussions between homeowners, electricians, builders and designers. A
homeowner can explore why a bedroom may not need the same target as a kitchen. A builder can compare options
during layout planning. A designer can test how beam angle and spacing may affect the feel of a room.
What is the room used for: relaxing, cooking, working or circulation?
2
What target lux feels appropriate for that use?
3
What lumen output are you considering per downlight?
4
Is the beam angle narrow, medium or wide?
5
What is the ceiling height?
6
Are the room finishes light, medium or dark?
7
Do you need broad general coverage, focused task light or both?
8
Have you allowed for utilisation and maintained light level?
9
Does the layout avoid obvious gaps, over-bright spots or uneven coverage?
10
Have you checked the assumptions in Downlight Planner?
The goal is not to produce a perfect prediction. The goal is to make better planning decisions before final
product selection and project coordination.
Planning guidance only disclaimer
This page is for general planning guidance only. It does not replace product data, professional judgement or a
site-specific lighting assessment. Real-world results vary by fitting photometry, ceiling height, room finishes,
furniture, beam angle, dimming and installation conditions.
FAQ
What are downlight lumens?
Downlight lumens measure the total amount of visible light produced by a downlight. Higher lumens usually
mean more total light, but the room may not always feel brighter unless the beam angle, spacing, ceiling
height and room finishes also support the layout.
What is a good lux level for downlights?
A good lux level depends on the room. Bedrooms often use softer planning targets, while kitchens and
studies usually need higher usable light. As a general guide, bedrooms may sit around 100-150 lux, living
areas around 150-250 lux, and kitchens or task areas around 300-500 lux. These are planning ranges only,
not compliance requirements.
Why does downlight beam angle matter?
Downlight beam angle affects how wide the light spreads. A narrow beam creates a smaller, more focused pool
of light. A wide beam spreads light across a larger area. This changes spacing, coverage, brightness and how
even the room feels.
Does a wider beam angle mean fewer downlights?
Not always. A wider beam can cover more area and improve overlap, but it also spreads the same lumens more
broadly. Depending on the target lux, ceiling height and room use, you may still need a different lumen
output, spacing pattern or number of fittings.
Why do two 800 lumen downlights look different?
They may have different beam angles, lenses, reflectors, trim designs or light distribution. The same 800
lumens can feel bright and focused in one fitting, but soft and spread out in another. Ceiling height, wall
colours, furniture and spacing also affect the result.
How does ceiling height affect downlights?
As ceiling height increases, the beam travels further before reaching the surface. This usually creates a
wider pool of light but lower intensity at the surface. Higher ceilings often need closer review of lumens,
beam angle, target lux and layout.
What does utilisation mean in downlight planning?
Utilisation is an allowance for how much of the light produced by the fittings is actually useful in the
room. Dark finishes, complex room shapes and furniture can reduce useful light. A utilisation input helps
make the estimate more realistic.
What is maintained light level?
Maintained light level is the expected light level after allowing for real-world reduction over time. It
recognises that light output, cleanliness and room conditions can change after the fittings are new.
Is Downlight Planner a downlight calculator?
Yes. Downlight Planner works as a practical downlight calculator for early layout planning. It lets users
adjust lumens, beam angle, target lux, custom target lux and utilisation to compare different room
scenarios.
Can this guide replace product or project advice?
No. This guide is for planning only. Final outcomes depend on the selected fitting, photometry, ceiling
height, room finishes, furniture, dimming and installation conditions.
Use the Downlight Planner
Test room dimensions, fitting lumens, beam angle and layout assumptions in the planner before refining the
setout.