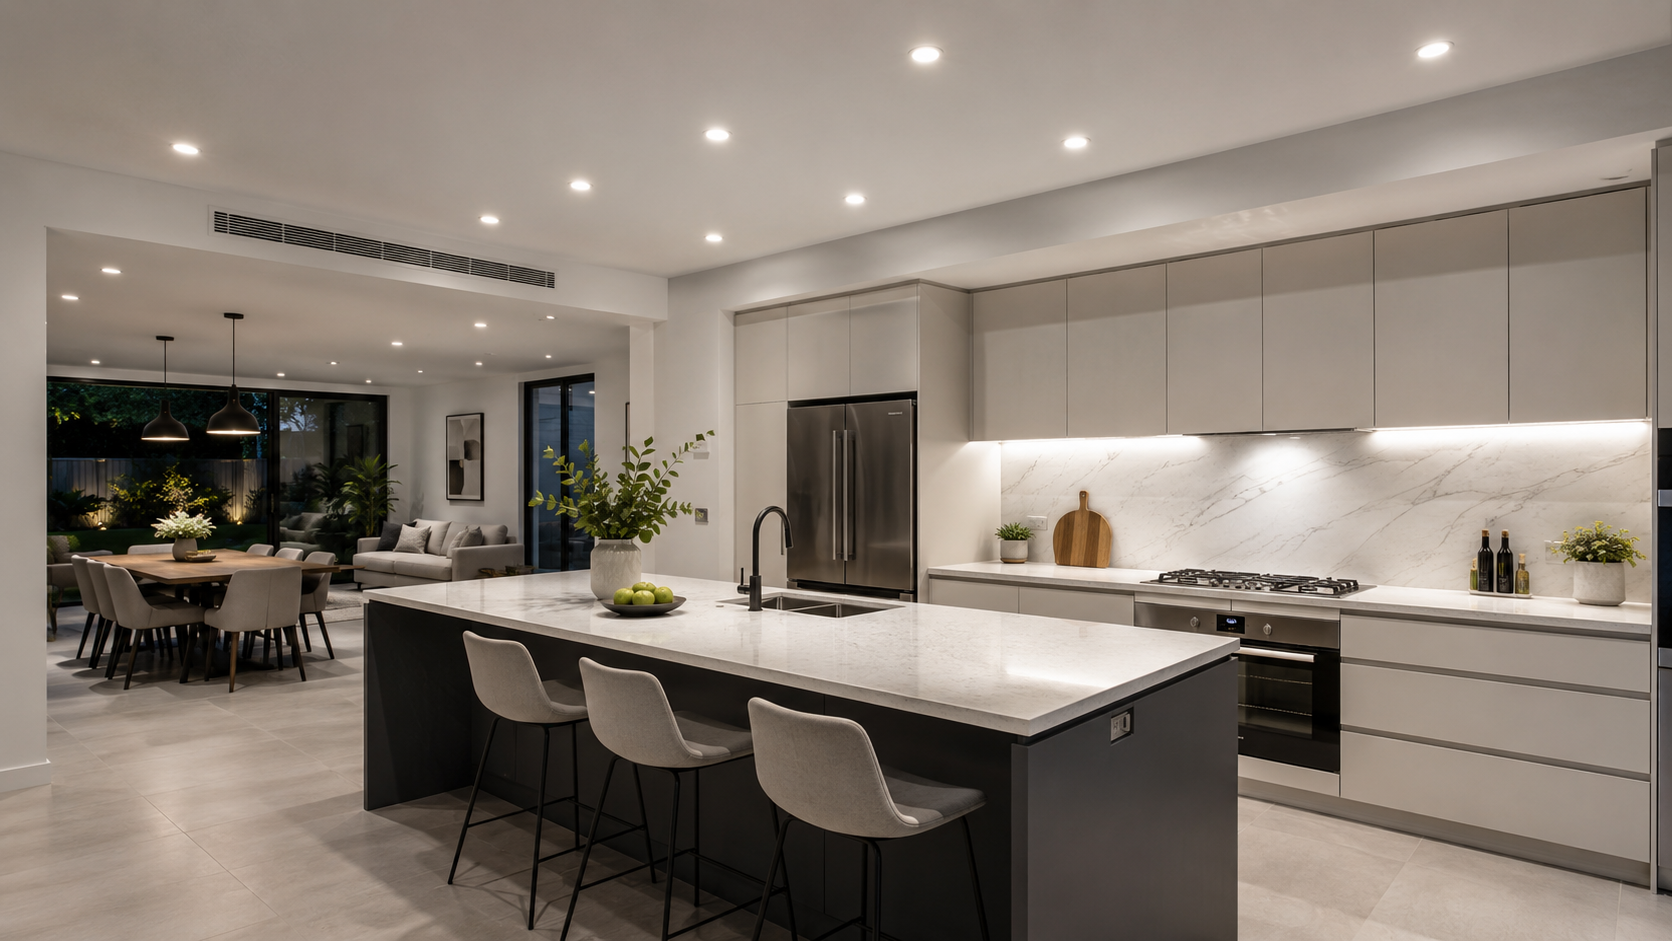
Kitchen Downlights: Layout, Spacing and Planning Tips
Kitchens are one of the hardest rooms to light well with downlights.
A kitchen is not just a room you walk through. It is a workspace, a social area, a food preparation zone and
often part of an open-plan living space. Good kitchen downlights should help you see clearly on benches and
islands without creating harsh glare, heavy shadows or a flat "ceiling full of lights" effect.
The aim is not simply to place downlights in a neat grid. A better kitchen downlight layout starts with the way
the kitchen is used: where people chop food, wash dishes, stand at the island, open cupboards, eat, talk and move
through the space.
From there, you can use Downlight Planner to test dimensions, ceiling height, lumens, beam angle
and spacing before the final layout is confirmed.
What good kitchen downlight planning means
Good kitchen downlight planning balances four things:
Useful light on task areas
Benches, islands, sinks and cooking areas need enough light for food preparation and cleaning. These areas often
need more focused planning than walkways or open floor zones.
Comfortable light for people
Kitchens are social spaces. Downlights should not create distracting glare when someone is standing at the
island, sitting nearby or looking across an open-plan room.
Controlled shadows
A common mistake is placing kitchen downlights behind where a person stands. This can cast the person's shadow
directly onto the bench. The layout should put useful light in front of or over the working area, not only behind
the user.
Layers of light
Downlights can provide strong general light, but they are rarely the whole answer. Under-cabinet lighting,
pendant lighting, wall lighting, rangehood lighting and feature lighting can all help make the kitchen more
comfortable and practical.
For early planning, open Downlight Planner and enter the kitchen's room dimensions, ceiling height and proposed
downlight output. You can then compare different beam angles, fitting quantities and spacing options before
refining the plan with your project team.
Start with the kitchen zones
Before thinking about exact kitchen downlight spacing, divide the room into zones. This is especially useful for
open-plan homes, where the kitchen may connect directly to dining and living areas.
Kitchen area
Main lighting goal
Planning notes
Benches against walls
Clear task light
Avoid placing all light behind the person working at the bench. Consider under-cabinet lighting where overhead light is blocked.
Island bench
Task and social light
Downlights can work well, but pendants or linear lighting may add comfort and character.
Sink area
Clear cleaning light
Plan light so the sink is not in shadow when someone stands in front of it.
Cooking area
Practical visibility
Ceiling light may help, but it should not be the only source where cabinetry or the user's body creates shadows.
Walkways
Safe general light
Usually needs less intensity than benches and prep zones.
Open-plan edge
Smooth transition
Avoid a bright kitchen next to a dim living area unless that contrast is intentional.
This zoning approach helps avoid the "one grid for everything" problem. A neat grid may look tidy on a plan, but
it can miss the actual working surfaces.
There is no single spacing rule that works for every kitchen. A small galley kitchen, a large open-plan kitchen
and a kitchen with dark joinery can all need different layouts.
As a broad early planning range, many kitchen downlight layouts start with spacing around 1.2-1.8 metres between
fittings for general ceiling lighting, depending on ceiling height, downlight output and beam angle. Wider
spacing may work in some open areas with broad beams and higher output. Closer spacing may be needed where a
more even task light is required.
For wall benches, downlights are often planned somewhere around 600-900 mm from the wall, but the best position
depends on the bench depth, wall cabinets, ceiling height and where the person stands. In many kitchens, a useful
reference is to think about the front half of the benchtop, rather than placing lights too close to the wall or
too far behind the user.
For islands, spacing should respond to the island length and width. A long island may suit a line of downlights
along the working zone. A wider island may need a layout that avoids leaving the centre dull or the edges too
bright. Where pendants are used, downlights may be reduced or positioned to support rather than compete with
them.
Use these ranges as planning prompts, not fixed answers. Downlight Planner can help compare options by adjusting
the room size, lumens, beam angle and layout until the spread looks sensible for the kitchen shape. For broader
spacing guidance, see the Downlight Spacing Guide.
Wall offsets and bench shadows
Bench shadows are one of the biggest issues in kitchen lighting. If downlights are placed in the centre of the
room only, the person preparing food may stand between the light and the bench. The result is a bright floor and
a shadowed work surface.
For benches along a wall, downlights usually need to be planned with the benchtop in mind, not just the ceiling
grid. The goal is to get light onto the working area without creating glare on glossy benchtops, splashbacks or
cabinet finishes.
A practical planning method is:
Mark the main bench runs on the plan.
Mark where people will stand while preparing food.
Check whether light will fall in front of the user or behind them.
Add under-cabinet lighting where downlights alone are unlikely to reach the work surface evenly.
Under-cabinet lighting is especially useful because it lights the benchtop directly from the front edge of the
cabinets. In many kitchens, it does more for food preparation than adding extra ceiling downlights. For the wall
offset side of the plan, see
How Far Should Downlights Be From the Wall?.
Island downlights and open-plan kitchens
Kitchen islands are often both practical and social. They may be used for food preparation, homework, casual
meals, entertaining and serving. Because of this, island lighting should be flexible.
A row of downlights over an island can provide strong working light. However, downlights alone may feel plain or
too direct in a kitchen that is also a living space. Pendant lights, a linear feature light or soft surrounding
light can make the island feel more comfortable when it is not being used for food preparation.
In open-plan kitchens, avoid treating the kitchen as completely separate from the dining and living zones. A very
bright kitchen next to a warm, dim lounge area can feel harsh at night. Dimming helps, but layout matters too.
The kitchen downlight layout should transition naturally into nearby spaces, with separate control of major zones
where possible.
Glare and reflections
Kitchens often include shiny or reflective surfaces: stone benchtops, polished tiles, glass splashbacks,
stainless appliances and smooth cabinetry. These can make glare more noticeable.
Glare is not only about brightness. It is also about viewing angle. A downlight that feels fine when standing
under it may be uncomfortable when seen from a sofa, dining chair or hallway. This is particularly important in
open-plan homes, where kitchen downlights are visible from other rooms.
Issue
Planning response
Lights visible from seated areas
Check sightlines from dining and living zones.
Shiny benchtops
Avoid creating intense reflected spots where people look down to work.
Dark ceilings or finishes
Expect more contrast and less reflected light.
Very narrow beams
Use carefully, as they can create bright pools and darker gaps.
Too many fittings
More downlights do not automatically mean better light.
A lower-glare fitting, wider beam or better-positioned layout may be more effective than simply increasing the
number of downlights. For beam angle and output context, see
Lumens, Lux and Beam Angle Explained.
Why downlights alone are often not ideal
Kitchen downlights are excellent for general light and can contribute to task lighting, but they often need
support from other light sources.
Downlights alone may not be ideal when:
Wall cabinets block light from reaching the benchtop.
The main work surface is along a wall.
The kitchen has dark joinery or dark benchtops.
The ceiling is high or raked.
The island is used as both a workspace and a social setting.
The kitchen connects to a softer living or dining area.
Layered lighting gives more flexibility. Under-cabinet lighting can brighten food preparation areas. Pendants can
define an island. Cabinet lighting can add depth. A dimmable downlight layout can provide practical brightness
when cooking and softer light when entertaining.
The best kitchen lighting plans usually combine ceiling downlights with at least one task or accent layer.
Dimming and control
Dimming is valuable in kitchens because the room changes purpose throughout the day. Bright light may be useful
for cooking and cleaning. Softer light may suit breakfast, evening drinks or open-plan living.
Where practical, think in zones:
Lighting zone
Why separate control helps
Main kitchen downlights
Provides general room brightness.
Island lights
Useful for task work or social focus.
Under-cabinet lights
Supports bench work without lighting the whole room.
Open-plan transition lights
Helps balance kitchen, dining and living spaces.
Even a well-spaced kitchen downlight layout can feel too bright if everything comes on at once. Planning dimming
and zones early makes the room more adaptable. See
Dimmable Downlights for Comfortable Rooms for
more comfort planning.
Common kitchen downlight mistakes
Using a simple ceiling grid without considering benches
A grid may look clean on paper but can leave the actual food preparation areas poorly lit.
Placing downlights behind the person working
This often casts shadows across the benchtop, especially along wall benches.
Relying only on ceiling lights
Downlights may not reach under cabinets or onto vertical surfaces effectively. Under-cabinet or task lighting
often improves the result.
Over-lighting the kitchen
Too many downlights can create glare, visual clutter and an uncomfortable open-plan space.
Ignoring the island's purpose
An island used for chopping, eating and entertaining may need a different approach from a simple walkway or bench.
Forgetting room finishes
Dark cabinets, dark floors and matte surfaces can absorb more light. Glossy surfaces can reflect it. Both affect
how the lighting feels.
Not testing beam angle and lumens together
A wide beam with lower output may feel different from a narrow beam with higher output, even if the fitting
count is the same. Use a downlight calculator to compare options rather than relying only on fitting quantity.
Practical kitchen downlight checklist
Use this checklist before finalising a kitchen downlight layout:
Measure the kitchen dimensions in metres.
Note the ceiling height.
Mark benches, island, sink, cooking area and walkways.
Identify where people will stand for food preparation.
Check whether any downlights would sit behind the user and cast shadows.
Plan wall bench lighting around the work surface, not only the ceiling grid.
Consider under-cabinet lighting for benches below wall cabinets.
Check island lighting separately from the rest of the kitchen.
Think about glare from glossy benchtops, splashbacks and appliances.
Review sightlines from dining and living areas in open-plan rooms.
Decide which lighting groups should be dimmable or separately controlled.
Test different lumens, beam angles and spacing in Downlight Planner.
Confirm the final plan with the relevant project professionals and selected product data.
Using Downlight Planner for a kitchen
Downlight Planner is designed to help you test ideas before committing to a layout. For kitchens, it is
especially useful because small spacing changes can affect benches, islands and shadows.
You can use it to compare:
Kitchen room dimensions.
Ceiling height.
Number of downlights.
Approximate lumen output.
Beam angle.
Spacing and layout options.
Different arrangements for open-plan zones.
For example, you might test one layout with evenly spaced ceiling downlights, then another with the fittings
shifted closer to the bench runs. You might also compare a broad beam for general light against a narrower beam
for more focused areas. The result is not a guarantee of exact real-world performance, but it gives a clearer
planning basis for discussion.
Planning guidance only disclaimer
This page is for general planning guidance only. It does not replace product data, professional judgement or a
site-specific lighting assessment. Real-world results vary by fitting photometry, ceiling height, room finishes,
furniture, beam angle, dimming and installation conditions.
FAQ
How far apart should kitchen downlights be?
Many kitchen downlight spacing plans start around 1.2-1.8 metres apart, depending on ceiling height, fitting
output, beam angle and room finishes. Task areas such as benches and islands need more careful planning than
general walkways.
Where should downlights go over kitchen benches?
For wall benches, downlights are often planned to light the working area rather than the wall or the floor
behind the user. A common planning range is around 600-900 mm from the wall, but the right position depends
on bench depth, cabinetry and ceiling height.
Are downlights enough for a kitchen?
Often, no. Downlights can provide strong general light, but under-cabinet lighting is usually better for
benches below wall cabinets. Islands may also benefit from pendants or other feature lighting, especially in
open-plan homes.
How do I avoid shadows on kitchen benches?
Avoid placing all the downlights behind where someone stands to prepare food. Plan the layout around the
bench surface and the user's position. Under-cabinet lighting can also reduce shadows on work areas.
Should kitchen downlights be dimmable?
Dimming is usually worth considering because kitchens are used for cooking, cleaning, dining and socialising.
Separate zones for main downlights, island lighting and under-cabinet lighting can make the space more
flexible.
Can I use a downlight calculator for kitchen planning?
Yes. A downlight calculator such as Downlight Planner can help test kitchen dimensions, lumens, beam angle
and layout options. Treat the result as planning guidance, then refine it against the actual fittings,
finishes and project details.
Use the Downlight Planner
Test room dimensions, fitting lumens, beam angle and layout assumptions in the planner before refining the
setout.