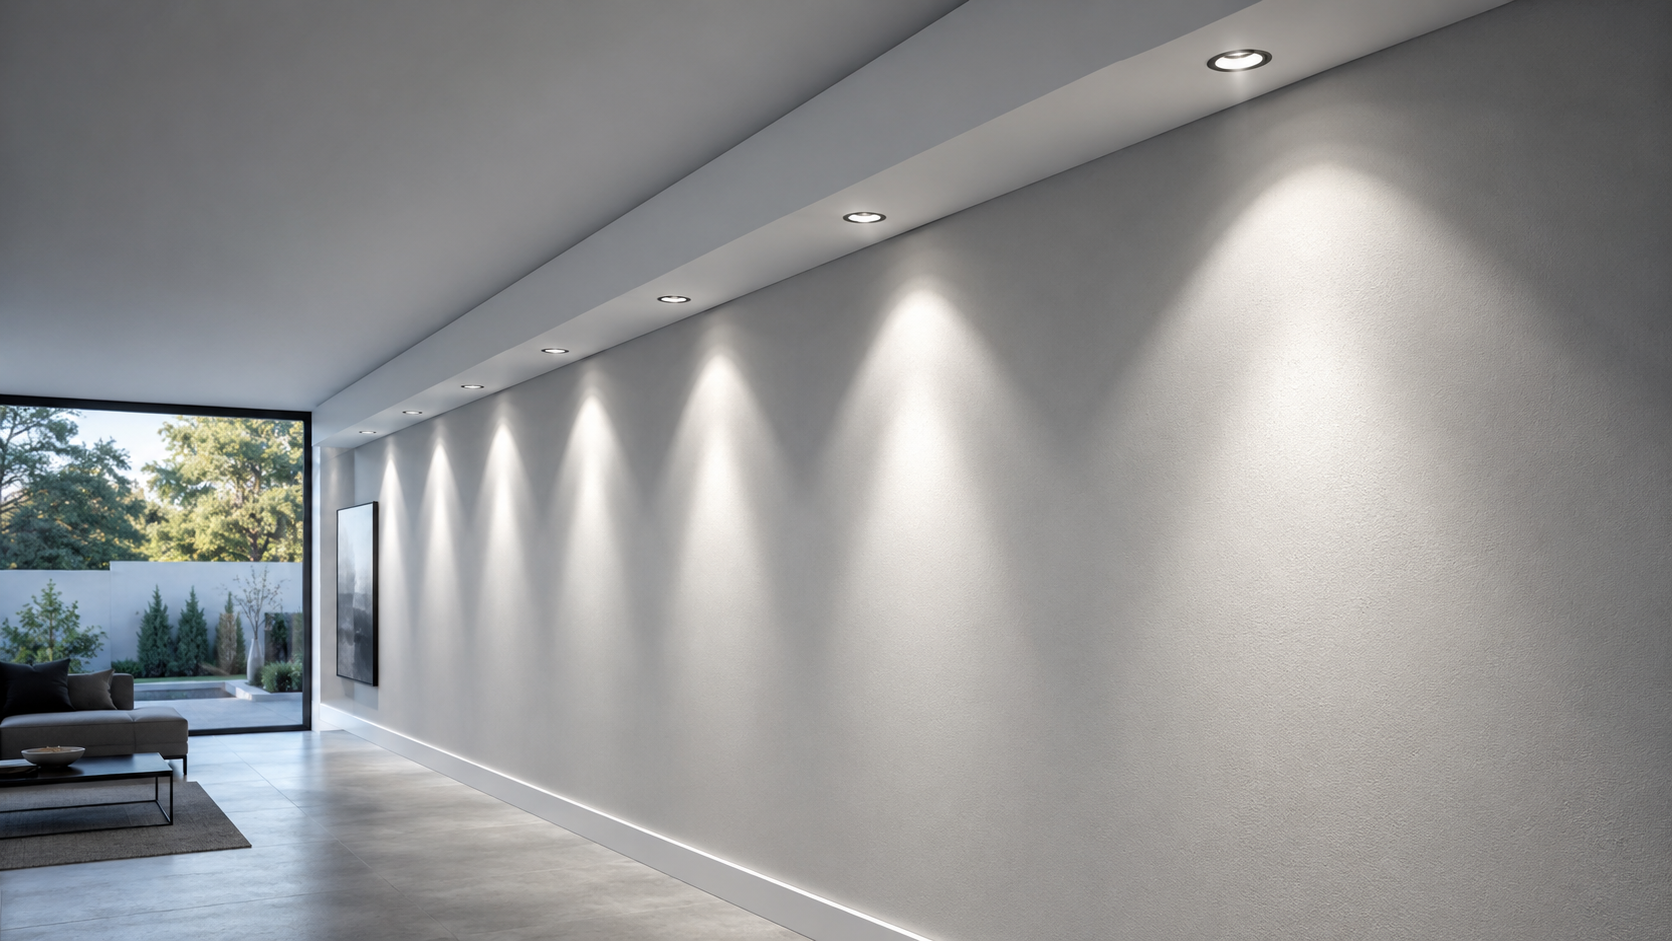
When planning a downlight layout, one of the first questions is: how far should downlights be from the wall?
This distance is often called the wall offset. It is the measurement from the wall to the centre of
the downlight, not to the edge of the fitting.
As a general planning guide, many residential layouts start with a wall offset of around 600 mm to 900 mm from
the wall. Smaller rooms, lower ceilings, narrow hallways and task-focused areas may use a smaller offset. Larger
rooms, higher ceilings and wider open spaces may need a larger offset.
There is no single perfect wall distance that works for every room. The best position depends on
ceiling height, beam angle, fitting output, room finishes, furniture, cabinets, curtains, artwork, dimming and
the overall lighting effect you want.
That is why Downlight Planner is designed to estimate a practical nearest wall offset and centre-to-centre
spacing based on your room dimensions. It is a planning tool, not a guarantee of exact lighting performance, but
it gives homeowners, electricians, builders and designers a useful starting point.
What does wall offset mean?
Wall offset means the distance between a wall and the centre point of the nearest downlight.
For example, if a downlight is placed 750 mm from the wall, that means the centre of the downlight is 750 mm
away from the wall surface. The actual trim or face of the fitting will be closer to the wall because the
fitting has its own diameter.
Wall offset matters because downlights do not light a room evenly from a single point. Each fitting creates a
cone of light. Where that cone lands depends on the beam angle, ceiling height and the distance from nearby
walls.
A downlight placed too close to a wall may create harsh bright patches, glare or strong scalloping. A downlight
placed too far away may leave the room edge darker than expected.
A practical starting point for wall offset
For many typical rooms with standard ceiling heights, a useful starting point is:
Set the first row of downlights approximately 600 mm to 900 mm from the wall.
This is not a fixed rule. It is a planning range. The right offset may be smaller or larger depending on the room.
Offset approach
Typical effect
Closer to the wall
Brighter wall edges, stronger wall effect, higher chance of scalloping or glare
Further from the wall
Softer general room lighting, but higher chance of darker edges
Balanced offset
Enough light reaches the walls without creating harsh patterns
For an easier starting layout, use Downlight Planner to estimate both wall offset and spacing
across the room.
Why distance from the wall matters
The offset from the wall affects more than just brightness. It changes how the room feels.
Scalloping
Scalloping is the repeated arc or fan pattern you see on a wall when downlights are placed close enough for
their beams to visibly hit the vertical surface.
A small amount of scalloping can look intentional on feature walls or textured surfaces. Too much scalloping can
make a wall look uneven, especially in hallways or along long plain walls.
Scalloping is influenced by wall offset, beam angle, ceiling height, distance between downlights, wall colour and texture.
A narrow beam placed close to a wall is more likely to create defined scallops. A wider beam or a larger offset
usually softens the effect.
Dark edges
If downlights are too far from the wall, the centre of the room may feel bright while the edges feel dull. This
can make a room seem smaller, especially when walls, corners or cupboards are not receiving enough light.
Dark edges are common when a layout only focuses on the middle of the room and ignores the perimeter.
Glare
Downlights too close to a wall, cabinet face, mirror, glossy splashback or artwork can produce uncomfortable
glare. The issue is not only the fitting itself; reflected light from shiny surfaces can also be distracting.
In kitchens, wardrobes and display areas, this matters because people often stand close to vertical surfaces
while looking at benches, shelves or doors.
Wall washing
Wall washing is when light is used to brighten a wall evenly. This can make a room feel larger and cleaner, and
it can help highlight artwork, shelves or textured finishes.
For smoother wall washing, the offset and centre-to-centre spacing need to work together. Downlights that are
too far apart may create uneven patches. Downlights that are too close may over-brighten parts of the wall.
Usable light
Usable light is the light that actually helps people see what they are doing. A downlight layout can look
symmetrical on a plan but still miss important surfaces such as benchtops, wardrobes, desks, dining tables or
artwork.
The best wall offset is not always the one that looks neatest on paper. It should support the way the room is used.
General rooms: living rooms, bedrooms and studies
For general rooms, a wall offset of around 600 mm to 900 mm is often a reasonable planning range. This helps
avoid placing the first row too close to the wall while still allowing light to reach the perimeter.
In living rooms, consider where people sit. Downlights directly above seating can feel uncomfortable, especially
when people lean back and look upward. A slightly adjusted layout may be better than a perfectly even grid.
In bedrooms, wall offset should consider wardrobes, bedsides, curtains and feature walls. A row too close to the
bedhead may create glare when lying down. A row too far from wardrobes may leave storage areas underlit.
In studies or workspaces, the offset should support desks, shelving and reading areas. A downlight behind the
user can cast shadows onto the desk, while one too far forward may cause glare on screens.
Kitchens
Kitchens often need more careful planning than standard rooms because light needs to reach benchtops, islands,
sinks, cooktop areas and cabinet faces.
A common mistake is spacing downlights evenly across the kitchen ceiling without considering where the benches
are. This can leave the user standing between the light and the work surface, creating shadows.
For kitchen planning, consider:
The depth of wall cabinets
The front edge of benchtops
Island size and seating
Splashback reflectivity
Pendant lights or rangehood lighting
Whether the room also needs general circulation light
In many kitchens, the best offset is guided by the working surface rather than the wall alone.
For example, downlights near a bench may be positioned to light the front portion of the benchtop, not simply
centred between the wall and the room.
Use Downlight Planner as a starting point, then adjust the layout around cabinets, islands and task areas.
Hallways
Hallways are narrow, so the wall offset is usually smaller than in larger rooms. A typical hallway may only need
a single line of downlights along the centre, rather than multiple rows near each wall.
In a hallway, the key issue is often not the offset from the side walls but the spacing along the length of the
hall. If downlights are too far apart, the floor and walls may show alternating bright and dark zones. If they
are too close to the wall, scalloping can become obvious.
For long corridors, consistent centre-to-centre spacing usually matters more than trying to push lights toward the walls.
Wardrobes and storage areas
Wardrobes need light where people choose clothes, read labels and see into shelves. A standard room grid may not
work well if the downlights are behind the person or blocked by doors, shelves or hanging clothes.
For built-in wardrobes, consider the wardrobe face, door swing, sliding tracks and shelf depth. A downlight
placed too far into the room may light the floor but not the storage. A downlight too close to glossy doors may
create glare.
In walk-in wardrobes, wall offset may be smaller because the space is narrow and storage runs along the walls.
The aim is to get useful light onto vertical storage surfaces without creating harsh glare at eye level.
Feature walls and artwork
Feature walls are different from general room lighting. Here, the aim may be to intentionally light the wall,
artwork, stone, timber panelling or shelving.
A smaller offset can create a stronger effect, while a larger offset can produce a softer wash. The right choice
depends on whether you want drama or evenness.
Artwork can change the best offset from the wall. A framed picture with glass may reflect the downlight
if the angle is wrong. Textured walls may exaggerate shadows. Dark paint may absorb more light than a pale wall.
For feature walls, do not rely only on a generic spacing rule. Treat the wall as part of the lighting design.
Relationship between wall offset and centre-to-centre spacing
Wall offset and centre-to-centre spacing are connected.
Wall offset is the distance from the wall to the first downlight. Centre-to-centre spacing is the distance between downlights.
A common planning approach is to make the wall offset roughly half of the centre-to-centre spacing. For example,
if downlights are spaced around 1.6 m apart, the first row might sit around 800 mm from the wall.
This helps create a more even spread of light because the room edge receives a share of the light pattern rather
than being treated as an afterthought.
However, this relationship is only a starting point. It may change when:
The ceiling is higher or lower than usual
The beam angle is narrow or wide
The room has dark finishes
Cabinets or curtains project from the wall
Furniture changes how people use the space
The layout needs to avoid glare or shadows
A visual planning calculator can help estimate this relationship quickly. Downlight Planner
estimates both nearest wall offset and spacing so you can start with a more balanced layout. For a wider
overview, see the Downlight Spacing Guide.
Examples table: typical planning offsets
These examples are generic starting points only. They are not rules and should be adjusted for the room, fitting
and intended lighting effect.
Area
Typical wall offset starting point
Spacing notes
Main things to watch
Living room
600-900 mm
Often works with balanced rows across the room
Seating glare, dark corners, curtains
Bedroom
600-900 mm
Adjust around bed, wardrobes and bedside areas
Glare when lying down, wardrobe shadows
Kitchen benches
500-800 mm from relevant wall or cabinet line
Plan around benchtops, not just room centre
User shadows, cabinet depth, splashback glare
Kitchen island
Based on island position
Align to usable work surface where possible
Pendant lights, seating, task light
Hallway
Often centred, or 400-700 mm depending on width
Length spacing is usually the key issue
Scalloping, alternating bright/dark patches
Wardrobe
400-700 mm depending on depth
Aim light toward storage faces
Door reflections, shelves, hanging clothes
Feature wall
400-900 mm depending on effect
Closer for drama, further for softer wash
Scalloping, artwork reflections, texture
Open-plan room
700-1,000 mm or more
Zones may need different spacing
Furniture layout, dining tables, circulation
Planning checklist
Before finalising a wall offset, check:
Is the first row close enough to avoid dark room edges?
Is it far enough from walls to avoid harsh scalloping?
Will it create glare on mirrors, splashbacks, artwork or glossy cabinets?
Does the layout light the surfaces people actually use?
Are curtains, wardrobes, shelving or bulkheads changing the effective wall position?
Does the centre-to-centre spacing still look balanced after adjusting the wall offset?
Are different zones doing different jobs, such as task lighting, general lighting or wall washing?
The best layout is often not a perfect grid. It is a practical balance between even spacing, useful light and
the room's real features.
Planning guidance only disclaimer
This page is for general planning guidance only. It does not replace product data, professional judgement or a
site-specific lighting assessment. Real-world results vary by fitting photometry, ceiling height, room finishes,
furniture, beam angle, dimming and installation conditions.
FAQ
What is the ideal downlight distance from the wall?
For many general rooms, a practical starting point is around 600 mm to 900 mm from the wall to the centre of
the downlight. The best distance depends on ceiling height, beam angle, room size, finishes, furniture and
the type of light effect you want.
Should downlights be closer to the wall or the centre of the room?
They should usually be balanced between the room edge and the centre area. If they are too close to the
wall, you may see scalloping or glare. If they are too far from the wall, the edges of the room may feel
dark.
What does wall offset mean?
Downlight wall offset is the distance from a wall to the centre of the nearest downlight. It helps define
how much light reaches the perimeter of the room.
Is wall offset the same as downlight spacing?
No. Wall offset is the distance from the wall to the first downlight. Downlight spacing is the
centre-to-centre distance between downlights. A common planning method is for the wall offset to be roughly
half the centre-to-centre spacing, then adjusted for the room.
How far should downlights be from kitchen cabinets?
There is no single distance that suits every kitchen. The layout should consider cabinet depth, benchtop
position, splashbacks and where people stand while working. The aim is to light the usable bench area
without creating strong shadows or glare.
Why do my downlights make scallops on the wall?
Scalloping happens when the light beam hits the wall in visible arcs. It is affected by wall offset, beam
angle, ceiling height, spacing between downlights and wall texture. Moving lights further from the wall or
using a different beam pattern can change the effect.
Can furniture change the right wall offset?
Yes. Sofas, beds, dining tables, wardrobes, curtains, cabinets and artwork can all change the right offset. A
layout that works in an empty room may not work as well once furniture and finishes are included.
Should I use a visual layout calculator?
A visual layout calculator is useful for getting a starting layout quickly. Downlight Planner estimates
quantity, spacing and nearest wall offset, which you can then review against furniture, cabinets,
finishes and the intended lighting effect.
Use the Downlight Planner
Test room dimensions, fitting lumens, beam angle and layout assumptions in the planner before refining the
setout.