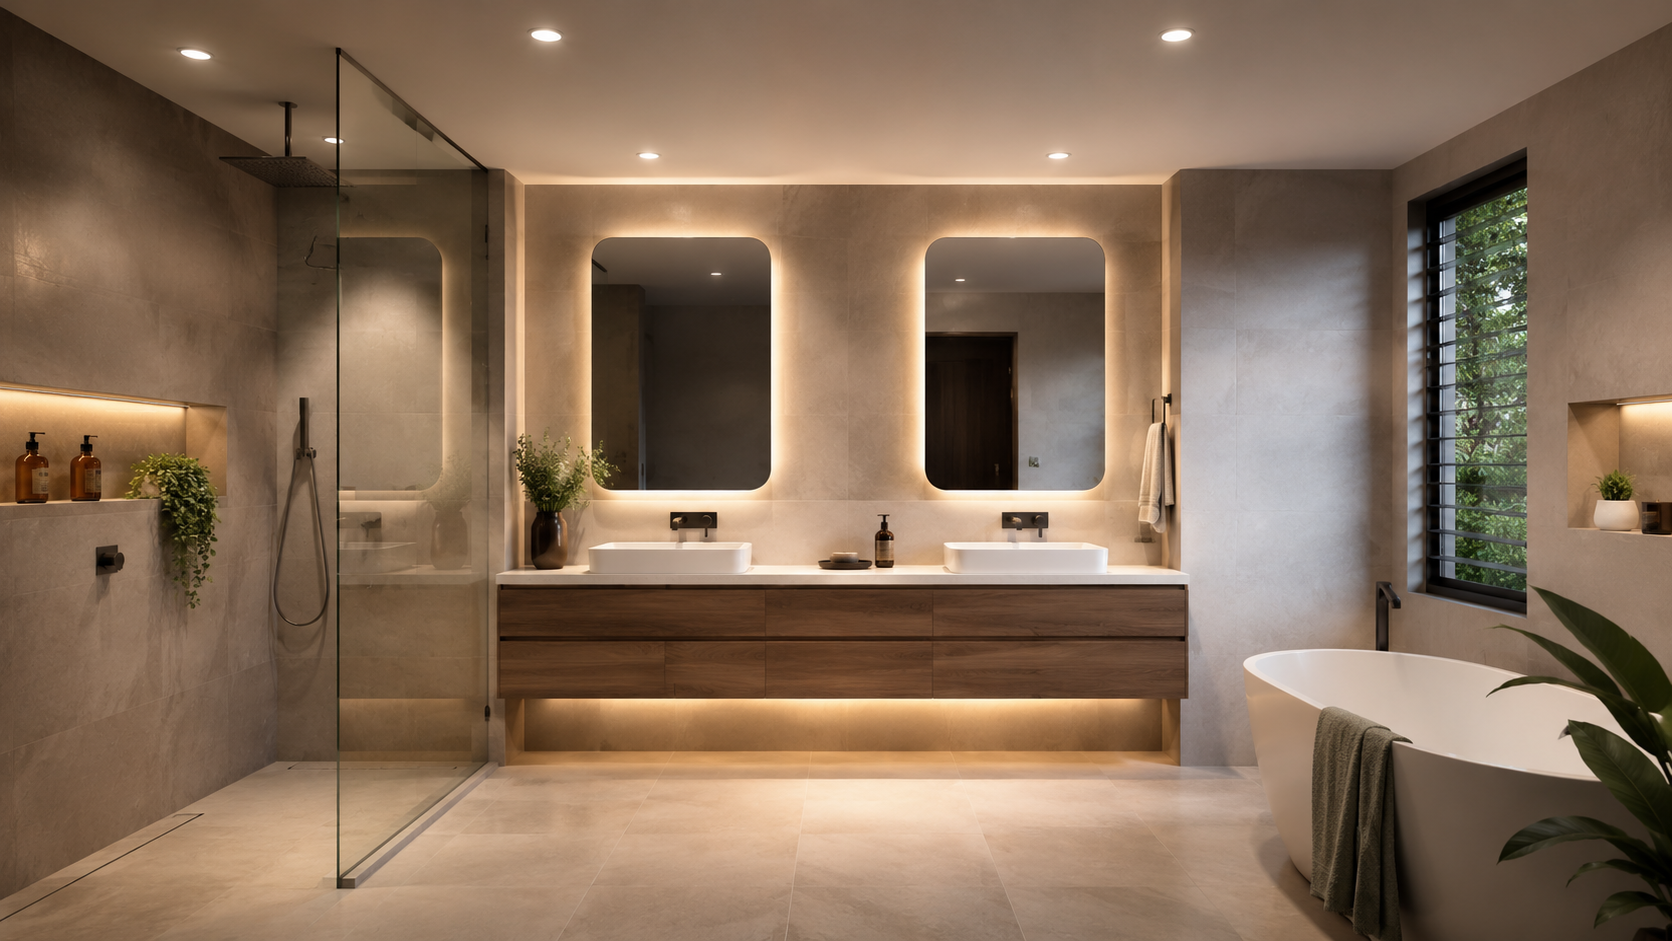
Bathroom Downlights: Layout, Spacing and Planning Tips
Bathroom downlights need more thought than simply placing one light in the middle of the ceiling.
A bathroom is usually compact, reflective and highly task-focused. You need enough general light to
move around comfortably, but you also need flattering, shadow-controlled light at the vanity and mirror.
A good bathroom downlight layout should help the room feel bright, calm and practical without creating
harsh glare, strong face shadows or dark corners. The best plan often combines ceiling downlights with
vanity or mirror lighting, rather than expecting downlights alone to do every job.
You can use Downlight Planner as a downlight calculator to test bathroom dimensions,
ceiling height, lumen output, beam angle and different layout options before finalising a plan with your
builder, designer or electrical professional.
What good bathroom downlight planning means
Good bathroom downlight planning is about balancing three different lighting needs:
Lighting need
What it does
Bathroom example
General lighting
Gives the room overall brightness.
Downlights across the main ceiling area.
Task lighting
Helps with close-up activities.
Vanity or mirror lighting for shaving, makeup and grooming.
Accent or comfort lighting
Adds softness and visual interest.
A wall wash near tiles, shelving or a bath feature.
The main mistake is treating the bathroom as a simple ceiling grid. A grid can work in a living room or
hallway, but bathrooms have mirrors, vanities, shower screens, baths, cabinetry and reflective surfaces.
These elements change how the light behaves.
For example, a downlight placed directly above someone standing at the vanity can throw shadows from
the brow, nose and chin onto the face. The room may feel bright overall, but the mirror can still be
poor for grooming. That is why bathroom downlights should be planned around people, mirrors and
surfaces, not just the ceiling shape.
Start with the vanity and mirror
The vanity is usually the most important task area in a bathroom. It is also where ceiling-only
lighting often performs worst.
When downlights are placed behind the person at the mirror, the body can cast a shadow forward. When
they are placed directly above the head, they can create harsh shadows under facial features. When they
are placed too far away, the mirror area can feel dim even if the rest of the room is bright.
A practical bathroom downlight layout usually treats the vanity zone separately from the rest of the
room. The aim is to support the mirror area without relying on ceiling downlights alone.
Good planning options include:
Vanity situation
Planning approach
Single vanity with mirror
Use ceiling light for general brightness, then add mirror or side lighting where possible.
Double vanity
Avoid placing one downlight only in the centre; check whether each basin position receives balanced light.
Large mirror
Consider how light reaches the face, not just the benchtop.
Dark cabinetry or tiles
Allow for more absorbed light and test higher lumen options carefully.
Gloss tiles or large mirrors
Watch for glare and bright reflections from poorly aimed or overly intense fittings.
Downlights can help brighten the vanity area, but mirror lighting is often better for face-level
illumination because it lights the face from the front or sides rather than from overhead.
Bathroom downlight spacing depends on ceiling height, beam angle, lumen output, room dimensions and the
surfaces in the room. There is no single spacing rule that suits every bathroom.
As a general planning starting point, many bathrooms work best with downlights spaced around 1.2 m to
1.8 m apart, depending on the fitting and ceiling height. Smaller bathrooms may need fewer fittings
placed more carefully, while larger bathrooms may need separate zones for the vanity, shower, bath and
circulation space.
For wall offsets, a common starting point
is around 600 mm to 900 mm from the wall, adjusted to suit the beam angle and the surface you want to
light. Too close to a wall can create harsh scalloping or bright patches. Too far from the wall can
leave the edges of the room feeling flat or shadowed.
Planning item
Useful starting point
Why it matters
Downlight spacing
1.2 m to 1.8 m apart.
Helps avoid bright spots and dark gaps.
Offset from walls
600 mm to 900 mm.
Helps balance wall brightness and reduce harsh edges.
Bathrooms need different moods at different times.
These are planning ranges only. A compact powder room with a low ceiling may need a very different
approach from a large ensuite with a double vanity, bath and dark stone finishes. For wider spacing
guidance, see the Downlight Spacing Guide.
Why one central bathroom downlight is often not enough
A single central downlight can make a small bathroom look simple on paper, but it often creates
compromises in real use.
The centre of the ceiling is rarely the centre of the tasks. The vanity might sit along one wall, the
shower might be in a corner, and the mirror may need more front-facing light. A central downlight can
brighten the floor while leaving the face in shadow.
Common problems with one central downlight include:
Problem
What it looks like
Mirror shadows
The face looks unevenly lit or tired.
Dark vanity edges
The basin area feels less bright than the centre of the room.
Glare
A bright fitting sits directly in the main line of sight.
Flat lighting
The bathroom feels functional but not comfortable.
Poor zoning
No difference between grooming light and softer night-time light.
For a very small powder room, one ceiling fitting may contribute enough general light, but it still may
not be ideal at the mirror. In most bathrooms, downlights should be part of the lighting plan rather
than the whole plan.
Glare and reflections in bathrooms
Bathrooms often contain glossy tiles, mirrors, glass screens, chrome tapware and pale surfaces. These
can bounce light around the room, which can be helpful, but they can also increase glare.
Glare happens when the eye sees a light source or a strong reflection that feels too bright compared
with the surrounding area. In bathrooms, this often occurs when downlights are placed too close to
mirrors or directly above highly reflective surfaces.
To reduce glare in the planning stage, think about:
Glare factor
Planning tip
Mirror position
Avoid placing intense downlights where they reflect directly into the eyes.
Glossy tiles
Test whether fewer, wider-beam fittings create a softer result.
Dark surfaces
Avoid overcorrecting with very bright narrow beams.
Low ceilings
Be careful with high-output fittings directly above standing areas.
Bath or vanity position
Consider what someone sees while standing or sitting in the space.
A bathroom should feel clean and bright, but not clinical or harsh. Beam angle, fitting choice and
dimming all influence that balance. For beam spread and output basics, see
Lumens, Lux and Beam Angle Explained.
Shadows: the biggest issue at mirrors
The mirror is where bathroom lighting succeeds or fails. Downlights above or behind the user can create
shadows that are especially noticeable during shaving, makeup, skincare and grooming.
The most common shadow problem is vertical face shadowing. The top of the face receives light, while
the eyes, nose, chin and neck become darker. This can happen even when the benchtop is bright.
Better planning usually means combining ceiling downlights with one of these approaches:
Layer
How it helps
Mirror lighting
Gives more even light to the face.
Wall lights beside the mirror
Reduces harsh overhead shadows.
Backlit mirror
Adds soft surrounding light, though it may still need task support.
Downlights set forward of the vanity
Can help, but must be tested for shadows and glare.
Downlights are useful for general bathroom brightness, but face-level task lighting is often more
effective at the vanity. This is the main reason bathroom downlights alone are not always ideal.
Planning around furniture, fixtures and room layout
Even though bathrooms are not usually furnished like bedrooms or living rooms, they still have fixed
elements that affect lighting. Vanities, mirrors, tall cabinets, shower screens, baths and toilets all
influence where light is useful.
Before choosing a bathroom downlight spacing pattern, mark the major elements on the plan:
Element
Lighting consideration
Vanity
Needs shadow-controlled task lighting.
Mirror
Can reflect glare if downlights are poorly placed.
Tall cabinet
May block or absorb light near the wall.
Bath
Often benefits from softer, more relaxed lighting.
Shower screen
Can create reflections or visual separation.
Toilet area
Usually needs simple general light, not a strong feature beam.
In a narrow bathroom, a straight line of downlights may work better than a grid. In a wider ensuite,
separate zones may make more sense. In a bathroom with a freestanding bath, the lighting may need to
feel softer and more balanced, rather than purely functional.
Dimming and lighting scenes
Dimming is especially useful in bathrooms because the room is used in different ways throughout the day.
Bright light may be useful in the morning, while softer light is often better at night.
A practical bathroom lighting plan might support:
Scene
Lighting feel
Morning routine
Brighter general and vanity light.
Evening bath
Softer, lower-level light.
Night use
Low glare and reduced brightness.
Cleaning
Higher overall brightness.
Downlights with dimming can make the bathroom more flexible, but dimming should not be used to fix a
poor layout. If the downlights create harsh shadows at full brightness, dimming may simply make the
shadows softer rather than solving the underlying problem. See
Dimmable Downlights for Comfortable Rooms
for more comfort planning.
Using Downlight Planner for a bathroom layout
Downlight Planner can help you compare bathroom downlight layout options before you commit to a final
plan. You can enter the room dimensions, adjust ceiling height, test lumen output, compare beam angles
and see how different spacing patterns affect the coverage.
For a bathroom, it is worth testing more than one layout:
Layout option
What to test
One central downlight
Check whether the vanity and room edges are underlit.
Two or three downlights in a line
Useful for narrow bathrooms.
Separate vanity and general zones
Helps balance task and ambient light.
Wider beam angle
May soften the room and reduce strong pools.
Lower output with more even spacing
Can reduce harsh contrast in compact rooms.
The planner is a guide, not a guarantee. It helps you compare options and have a clearer conversation
with your designer, builder or electrical professional.
Common bathroom downlight mistakes
Putting the only downlight directly above the vanity
This often creates shadows on the face. The benchtop may look bright, but the mirror experience can
still be poor.
Using a simple grid without considering the mirror
A neat ceiling layout is not always a good lighting layout. The user's position at the mirror matters
more than symmetry alone.
Placing downlights too close to reflective surfaces
Mirrors, gloss tiles and glass can produce uncomfortable reflections when fittings are poorly positioned.
Forgetting wall brightness
Bathrooms can feel smaller and duller when the walls are underlit. A little light on vertical surfaces
often makes the room feel brighter than light aimed only at the floor.
Expecting downlights to do every job
Downlights are useful, but they are not always the best source for grooming, makeup or soft night-time
lighting. Layered lighting usually works better.
Ignoring finishes
White tiles, dark stone, timber cabinetry and matte walls all reflect light differently. The same
bathroom downlight spacing can feel bright in one bathroom and underwhelming in another.
Practical bathroom downlight checklist
Use this checklist before finalising your bathroom downlight layout:
Measure the bathroom length, width and ceiling height in metres.
Mark the vanity, mirror, bath, shower screen, toilet and tall cabinets on the plan.
Decide which areas need general light and which need task light.
Treat the vanity and mirror as a separate lighting zone.
Avoid relying on one central ceiling light for the whole bathroom.
Test downlight spacing around 1.2 m to 1.8 m as a starting point.
Test wall offsets around 600 mm to 900 mm as a starting point.
Check whether the downlights create shadows on the face at the mirror.
Consider mirror, vanity or wall lighting where face-level light matters.
Watch for glare from mirrors, glass and glossy tiles.
Consider dimming for morning, evening and night use.
Use Downlight Planner to compare dimensions, lumens, beam angle and layout options.
Review the plan with the relevant project professionals before final decisions.
Planning guidance only disclaimer
This page is for general planning guidance only. It does not replace product data, professional judgement or a
site-specific lighting assessment. Real-world results vary by fitting photometry, ceiling height, room finishes,
furniture, beam angle, dimming and installation conditions.
FAQ
How many bathroom downlights do I need?
It depends on the bathroom size, ceiling height, lumens, beam angle, finishes and layout. A small
powder room may only need one or two ceiling lights for general brightness, while a larger ensuite
may need multiple downlights plus vanity lighting. Use a downlight calculator like Downlight
Planner to test different options.
What is the best bathroom downlight spacing?
As a planning starting point, many bathrooms use downlight spacing around 1.2 m to 1.8 m, but this
varies with the fitting and room. The best bathroom downlight spacing is the one that lights the
vanity, circulation areas and walls evenly without glare or strong shadows.
Should a downlight go directly above the bathroom mirror?
Not always. A downlight directly above the mirror or vanity can create shadows on the face. It may
help with benchtop brightness, but mirror or side lighting is often better for grooming tasks.
Are downlights enough for a bathroom vanity?
Often, no. Downlights can support the vanity area, but they are not always ideal as the only light
source for shaving, makeup or skincare. Face-level mirror or vanity lighting usually gives a more
even result.
How far should bathroom downlights be from the wall?
A common planning offset is around 600 mm to 900 mm from the wall, depending on ceiling height,
beam angle and the surface being lit. This should be tested rather than treated as a fixed rule.
Can I use Downlight Planner for a bathroom?
Yes. Downlight Planner lets you test bathroom dimensions, lumens, beam angle and layout patterns.
It is useful for comparing options before confirming the final bathroom downlight layout.
Use the Downlight Planner
Test room dimensions, fitting lumens, beam angle and layout assumptions in the planner before refining the
setout.