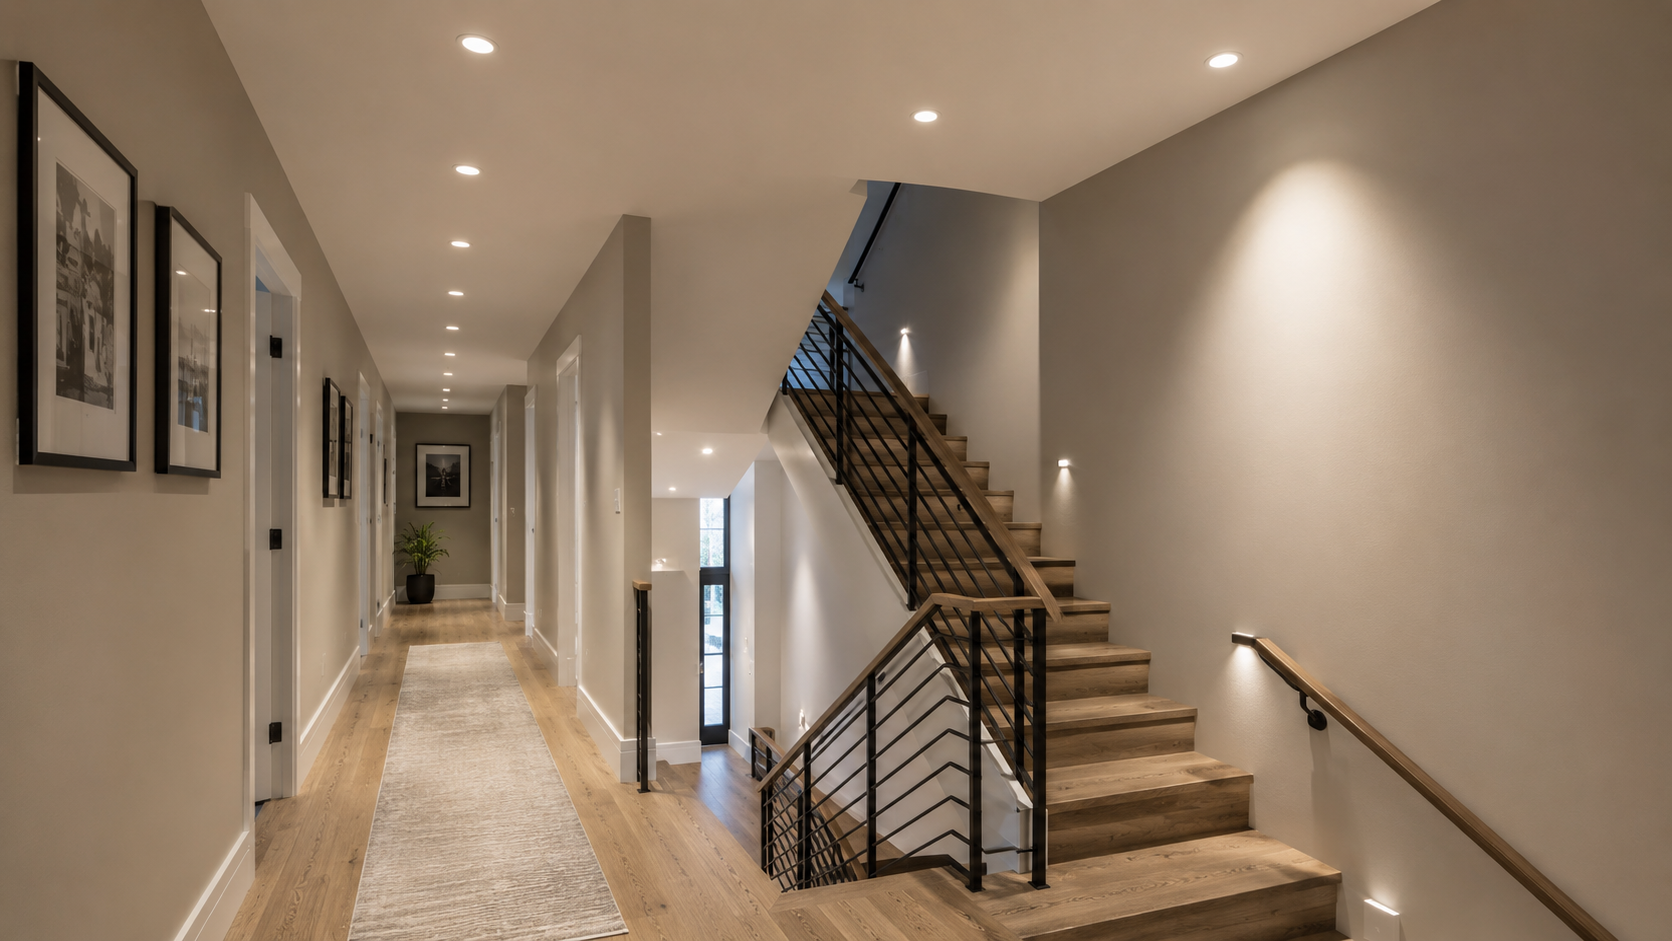
Hallway and Stairs Downlights: Layout, Spacing and Planning Tips
Hallways and stairs are easy to underestimate when planning downlights.
They are often narrow, long, irregular or broken up by doors, corners, landings and changes in ceiling
height. A layout that looks neat on a ceiling plan can still leave dark patches, glare spots or uneven
pools of light if the spacing and wall offsets are not thought through.
Good hallway and stairs downlight planning is about creating clear, even and comfortable coverage. The
aim is not to flood the space with light, but to make movement through the home feel natural, balanced
and safe-feeling without harsh glare or obvious dark gaps.
Downlight Planner can help you test hallway and stair dimensions, fitting lumens, beam
angle and layout options before committing to a ceiling plan. It is especially useful for long narrow
spaces where small spacing changes can noticeably affect the result.
Why hallway and stairs downlights need careful planning
A bedroom, kitchen or living room usually has a broader ceiling area to work with. A hallway or
stairwell is different. The light is often arranged in a line, the walls are close together, and people
move through the space rather than staying in one spot.
That means the layout has to do a few things well:
Keep the floor and walking path evenly lit.
Avoid strong bright spots directly over people's heads.
Reduce dark patches between fittings.
Avoid placing downlights too close to walls, doors or tall joinery.
Work with corners, landings and stair direction changes.
Feel comfortable at night when full brightness may not be needed.
In a hallway, poor spacing can create a "spot, gap, spot, gap" effect along the floor. On stairs, poor
placement can make treads and landings feel unevenly lit. In both spaces, the best result usually comes
from a simple, consistent layout that follows the path of movement.
What good hallway downlight planning means
For a hallway, good planning usually means placing downlights along the centreline of the circulation
path, with sensible spacing between each fitting and enough distance from the walls to avoid harsh
scalloping.
A typical hallway is long and narrow, so the main planning questions are:
How long is the hallway?
How wide is it?
How high is the ceiling?
Are there doors, cupboards, artwork or feature walls?
Does the hallway turn a corner?
Do you want soft night-time lighting, general brightness or a more decorative effect?
A simple straight hallway may only need a single row of downlights. Wider hallways, galleries or
corridors with feature walls may benefit from a more considered layout, such as offsetting fittings
slightly or using wall lights, pendants or picture lights alongside downlights.
The goal is even coverage without making the hallway feel like a runway.
What good stair downlight planning means
Stairs add more complexity because the walking surface changes height. Instead of lighting one flat
floor plane, you are lighting treads, risers, a landing and sometimes surrounding walls.
For stair areas, downlight planning should consider:
The top and bottom of the stair run.
Any mid-landing.
The direction people move through the space.
Whether the ceiling follows the stair angle or stays flat.
Whether the stairwell is open, enclosed or partly visible from another room.
How much glare a person may see when walking up or down.
A downlight placed in the wrong position can shine directly into someone's eyes when they move up the
stairs, especially in taller or more open stairwells. This is why downlights alone are not always the
best answer. Wall lights, step lights or soft indirect lighting can sometimes create a more comfortable
result, particularly where the stairwell is a design feature.
Hallway downlight spacing
For many standard hallways, spacing downlights evenly along the length of the hallway works well. The
exact spacing depends on the beam angle, ceiling height, lumen output and the brightness level you are
aiming for.
As a planning starting point, many hallway layouts use moderate spacing to avoid gaps between fittings.
In a narrow hallway, the fittings are usually centred across the width, then spaced along the length.
Hallway type
Practical planning approach
Short hallway
One or two downlights may be enough, depending on length and fitting output.
Long straight hallway
Use a consistent row with even spacing along the centreline.
L-shaped hallway
Treat each leg of the hallway as its own run and check the corner coverage.
Wide hallway or gallery
Consider downlights plus wall-focused lighting or feature lighting.
Hallway with cupboards
Check that doors, tall joinery and storage areas do not create awkward shadows.
The first and last downlights should not be placed randomly. A common planning approach is to set them
in from the ends of the hallway so the light pattern feels balanced rather than having one bright patch
at the start and a dark patch at the end.
Downlight Planner can help test these spacing choices by entering the hallway dimensions, light output,
beam angle and target lighting level, then comparing how different counts affect spacing and coverage.
For broader context, see the Downlight Spacing Guide.
Stair downlight spacing
Stair downlight spacing is less about creating a perfect ceiling grid and more about lighting the
movement path. The downlights should help the stair run, landing and entry or exit points feel evenly
covered.
In a stairwell, avoid thinking only in plan view. The downlights may look evenly spaced from above, but
the experience changes when someone is walking up or down.
Stair area
Planning consideration
Bottom of stairs
Avoid leaving the first few steps visually disconnected from the hallway or room.
Main stair run
Space fittings so the tread area feels continuous rather than patchy.
Landing
Treat the landing as a pause point that may need its own coverage.
Top of stairs
Blend the stair lighting into the upstairs hallway or room.
Open stairwell
Watch for glare from visible downlights across the void.
For stairs, it is often better to use fewer well-placed fittings with suitable beam spread than to add
too many bright points. Dimming can also help because stair and hallway lighting is often used at night,
early morning or when moving between rooms.
Wall offsets in narrow spaces
Wall offset is the distance between a
downlight and the nearest wall. In hallways and stairwells, this matters because the walls are often
close to the fittings.
If a downlight is too close to a wall, it may create harsh scallops, bright patches or vertical streaks.
If it is too far from the wall in a narrow hallway, the layout may not be centred properly or may fail
to light the walking path evenly.
For most narrow hallways, a centred row is the simplest starting point. The wall offset is then
naturally controlled by the hallway width. For example, in a 1.2 m wide hallway, a centreline row
places the fittings about 600 mm from each wall. In a 1.0 m wide hallway, that centreline offset becomes
about 500 mm.
Wider corridors, gallery hallways or feature walls may need a different approach. If the wall itself is
important, for example it has artwork, textured finishes or display shelving, downlights may not be the
best way to highlight it. Wall washers, picture lights or other layered lighting may produce a better
effect.
Avoiding dark patches
Dark patches are one of the most common hallway downlight problems. They usually happen when fittings
are spaced too far apart, the beam angle is too narrow, the lumen output is too low, or the ceiling
height changes.
In a hallway, dark patches often show up:
Between downlights.
At the ends of the hallway.
Around corners.
Near doorways.
At the top or bottom of stairs.
On landings.
The easiest way to reduce dark patches is to plan the whole run, not each fitting in isolation. Look at
the hallway length, decide whether the first and last fittings are balanced, then check whether the
centre-to-centre spacing creates a consistent rhythm.
For stairs, check the transition points. A stair run can be well lit in the middle but still feel poor
if the bottom step, top landing or turn is underlit.
Managing glare in hallways and stairs
Glare can be more noticeable in hallways and stairs than in larger rooms because people pass directly
under the fittings and may see them from shallow angles.
Glare may be affected by:
Fitting brightness.
Beam angle.
Ceiling height.
Downlight trim design.
Surface finishes.
Whether the person is walking toward the light source.
Whether the downlight is visible from another room or stair void.
In a hallway, glare can make the space feel harsh or overlit. In a stairwell, glare can be
uncomfortable when walking up toward a downlight or looking across an open void.
Good planning does not always mean adding more downlights. Sometimes it means using fewer fittings,
choosing a softer lighting level, using dimming, or combining downlights with wall lights or indirect
lighting. For lumen and beam angle basics, see
Lumens, Lux and Beam Angle Explained.
Furniture, doors and built-in storage
Hallways and stairs often include more than just empty circulation space. You may have linen cupboards,
shoe storage, console tables, artwork, mirrors, handrails or display niches.
These features can change the best downlight layout.
A downlight directly in front of a tall cupboard may cast shadows when doors are opened. A fitting too
close to a mirror may create uncomfortable reflections. A light placed behind someone standing at a
console table may cast a shadow over the surface.
Before finalising a hallway or stair downlight layout, mark the major fixed elements:
Door swings.
Built-in cupboards.
Tall storage.
Mirrors.
Artwork.
Stair handrails.
Landings.
Ceiling bulkheads.
Changes in ceiling height.
The ceiling layout should work with these features rather than simply dividing the ceiling into equal
sections.
Dimming for hallways and stairs
Dimming is especially useful for hallway and stair lighting because these areas are used at different
times of day and night.
A bright hallway may be helpful when cleaning, carrying items or moving between busy areas. The same
brightness may feel too harsh late at night. Dimming allows the same physical layout to feel more
comfortable across different situations.
However, dimming does not fix a poor layout. If downlights are badly spaced, dimming will reduce
brightness but the uneven pattern may still remain. The physical positions, beam spread and fitting
output still need to be planned properly.
For a more flexible result, think about how the space will be used:
Situation
Lighting goal
Day-to-day movement
Even, comfortable coverage.
Night-time movement
Lower brightness and reduced glare.
Cleaning or carrying items
Brighter general light.
Feature hallway
Ambient light plus wall or artwork lighting.
Open stairwell
Balanced light that looks good from multiple viewpoints.
Downlights are useful for general hallway and stair lighting, but they are not always the complete
answer.
Layered lighting may be better when:
The hallway has artwork or feature walls.
The stairs are a major design feature.
The space feels too narrow for multiple ceiling lights.
You want softer night-time movement lighting.
There are mirrors or glossy surfaces.
The stairwell is open to a living area.
You want to avoid a row of visible ceiling spots.
Layered options might include wall lights, low-level step lighting, picture lights, pendants in a stair
void, LED strip lighting to joinery, or lamps on nearby furniture. These can soften the space and reduce
reliance on overhead downlights.
The best result often comes from using downlights for general coverage and other lighting layers for
mood, visual interest or task-specific areas.
Using Downlight Planner for hallway and stairs layouts
Downlight Planner can help you test early layout ideas before you settle on a final ceiling plan. For
hallway and stairs downlights, it is useful for comparing how fitting count, lumens, beam angle and room
dimensions affect spacing.
You can use the planner to experiment with:
Hallway length and width.
Ceiling height.
Downlight lumen output.
Beam angle.
Target lighting level.
Number of fittings.
Layout spacing.
Wall offset.
Dimmable fitting assumptions.
For long narrow hallways, try testing several fitting counts rather than accepting the first result.
One extra or one fewer downlight can significantly change the spacing rhythm. For stairs, use the
planner to understand general coverage, then apply judgement around landings, changes in direction and
visible glare points.
The planner is a guide, not a guarantee. Final results depend on the actual fittings, room finishes,
beam distribution, furniture, ceiling conditions and installation details.
Common hallway and stairs downlight mistakes
Spacing fittings too far apart
This creates obvious bright and dark patches along the hallway or stair run. It can make the space feel
unfinished even if the total light output seems high on paper.
Placing the first and last fittings poorly
If the first fitting is too far from the entry, the start of the hallway may feel dull. If the last
fitting is too close to the end wall, it may create a bright patch with poor balance.
Ignoring corners and landings
L-shaped hallways and stair landings need specific attention. A layout that works on one straight run
may not carry light evenly around a corner.
Using downlights as the only layer in a feature space
A hallway with artwork, texture, timber, stone, mirrors or display joinery may look better with layered
lighting. Downlights alone can make the space functional but visually flat.
Overlighting a narrow hallway
Too many bright fittings in a narrow space can feel harsh. More downlights do not automatically mean a better result.
Forgetting glare from stair angles
A downlight that seems fine on plan may be uncomfortable when viewed from below, above or across an open
stairwell.
Not considering doors and storage
Cupboards, door swings and tall joinery can affect shadows and reflections. The ceiling layout should
respond to these fixed elements.
Practical checklist for hallway and stairs downlights
Use this checklist before finalising a hallway or stair downlight layout:
Measure the hallway or stair area in metres.
Note ceiling height and any changes in ceiling level.
Identify whether the hallway is straight, L-shaped, U-shaped or broken into sections.
Mark the top, bottom and landings of stairs.
Mark doors, cupboards, mirrors, artwork and tall furniture.
Decide whether the space needs general light only or layered lighting.
Check whether a single centreline row suits the hallway width.
Review the first and last downlight positions.
Keep spacing consistent where possible.
Avoid obvious dark patches between fittings.
Consider glare when walking up or down stairs.
Think about night-time use and whether dimming would help.
Use Downlight Planner to test dimensions, lumens, beam angle and fitting count.
Treat the planner result as guidance, then refine around real room features.
Planning guidance only disclaimer
This page is for general planning guidance only. It does not replace product data, professional judgement or a
site-specific lighting assessment. Real-world results vary by fitting photometry, ceiling height, room finishes,
furniture, beam angle, dimming and installation conditions.
FAQ
How far apart should hallway downlights be?
Hallway downlight spacing depends on the ceiling height, fitting lumens, beam angle and target
brightness. In many narrow hallways, the layout starts with a single centreline row spaced evenly
along the length. The aim is to avoid obvious bright and dark patches rather than follow one fixed
spacing rule.
Should hallway downlights be centred?
For many standard narrow hallways, centring the downlights across the width is a practical starting
point. It keeps the walking path evenly lit and creates a clean ceiling layout. Wider hallways,
gallery spaces or hallways with feature walls may need a different approach.
How many downlights do I need in a hallway?
The number depends on the hallway length, width, ceiling height, fitting output and beam angle. A
short hallway may only need one or two fittings, while a long hallway may need a consistent run.
Downlight Planner can help compare different fitting counts and spacing options.
Are downlights good for stairs?
Downlights can work well for stairs when they are planned carefully around the stair run, landings
and top and bottom transition points. However, stairs can also benefit from layered lighting such as
wall lights, step lights or pendants, especially where glare or visual comfort is important.
How do I avoid dark patches in a hallway?
Dark patches can be reduced by checking the full hallway run, not just individual fitting
positions. Review the spacing between downlights, the first and last fitting positions, beam angle,
lumen output and any corners or doorways that may interrupt the light pattern.
Should hallway and stair downlights be dimmable?
Dimming is often useful because hallways and stairs are used at different times of day and night. It
can make the space feel softer and more comfortable, but it does not replace good spacing or layout
planning.
Use the Downlight Planner
Test room dimensions, fitting lumens, beam angle and layout assumptions in the planner before refining the
setout.